HDD to SSD Clone Macbook Pro (2010-2019) OSX Utility Tool
Комментарии:

Sir paano kaya yung sa command sa windows keyboard para sa disk utility ?
Ответить
Nice for helping TRENCHGLITCH the credit card info working on so many shit since I got it from you, It damn hitting so hard. I want lasting relationship this’s good business📌
Ответить
How I come I don't have the restore option? Am I'm missing something? Thank you!
Ответить
I couldn’t restore “ Restore process has failed “ why if you can help
Ответить
have a like good man, you saved me!
Ответить
Anyone answering questions here? Again, why do I need to name the new SSD exactly the same as the old HDD? Thx
Ответить
To get to Disk Utility don'e you just type Disk Utility in Finder?
Ответить
Liked and subbed. Q: why do I have to name the new SSD the same as the old HD? Thx. Great vid. Keep it up.
Ответить
Very, very nice. No need for any 3rd party apps. Just needed to boot into IOS Recovery. In my case, the internal and external HDD and SSD all showed the same silver metal icon. However, if you clicked on those icons you could read the sizes of the drives. I was retiring an original 2011 time frame HDD with a current SSD. Too, I was required to upgrade my MacBook Pro from El Capitan to Catalina so that my IOS.16.1 would continue to be recognized by my ancient MacBook. Another note, if you pay attention in the video, it was said that the cloning could take anywhere from minutes to hours. My half full 320GB HDD took about 1 hour and 50 minutes (110 minutes total) to complete the cloning. Seemed like a long time, but it is installed, boots, and all is working well. As a previous poster said, you did need to unmount both drives at the beginning. On the back end, I only mounted the new SSD. When I went to the Startup Disk routine, it only showed 1 drive to select for the system boot. Hope this might help someone going forward. Thanks to Never Stop Tech.
Ответить
I was following another tutorial because want upgrade from HD to an SSD. But after the restoration process and try to initialize the system using the SSD, get the white screen with ? folder.
So, the difference (and what I think gona be the game changer) is the final step when you set the drive wanted to use as the System default starter.
Trying this right now, hope works for me this time.
Thank you!!!

baru tau ane, ga perlu pake program pihak ketiga, mantap
Ответить
Thanks! Awesome tutorial! 💯
Ответить
Thanks for sharing !
Ответить
Thank you for the help.
Ответить
Fan-tas-tic, very well explained and very clear, congratulations!
Ответить
When you said the data source needed to be unmounted as well, the video showed that it's still mounted then you proceeded with restoring to the external hard drive. Which one is correct?
Ответить
Question:
Does this Cloning also clones my Windows 11 and Linux partition, so I can triple boot from my new SSD drive ???

great video!! Question, can I use this method to only update/back up new files after I've done a clone of the 2 drives?
Ответить
Thanks man worked perfectly
Ответить
What if your HD is not Mac OS Extended (Journaled), but instead APFS (Encrypted)... should it still be the same steps?
Ответить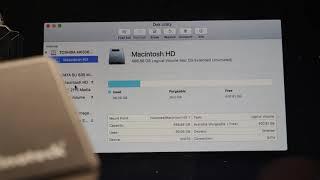


![Devault - Leave Me Low feat. Griff Clawson (Official Video) [Ultra Music] Devault - Leave Me Low feat. Griff Clawson (Official Video) [Ultra Music]](https://invideo.cc/img/upload/a0JKd1ZTWmtIeUs.jpg)


