Комментарии:

Super helpful as always!
Ответить
Sean seem like a nice guy. ✌✌
Ответить
Good WorkMan
Ответить
Hi Sean, thanks for the sharpening tips. If I want to use orten effect or other way to give a dreamy look of the image, that should be before output sharpening or after output sharpening?
Ответить
Excellent overview Sean; thank you !
Ответить
Another first-class video, Sean. Thanks! When you are output sharpening for a large print, do you allow Ps to resize larger with upsampling, or do you always do that in another app?
Ответить
Really really helpful Sean. A+
Ответить
Nice job!
Ответить
Hi Sean: Thank you for preparing this video. I must admit that I only do Input Sharpening so with this additional knowledge I am sure that my end-goal for my images will be enhanced. Cheers, Keith (Canada)
Ответить
Great video as always Sean, thank you for your fantastic education! I have a question...I have my website through Smugmug which allows people to purchase my images for print through their 3rd party printer. Smugmug's platform makes it easy for clients to get prints and for me because I don't have to manage that process. I upload my images to my website at the image's native resolution (I use a Nikon D850) so that the high quality, full resolution is available for whatever size print (or digital version) the client may want. However, I'm caught between how I should sharpen my images for this output. I want my images to look sharp on my screen (my website), yet if I sharpen to optimize for the web, it limits the size of print or digital copy a client can order. Yet if I sharpen the image for print output at the image's native resolution, it doesn't look as sharp/crisp on my website because it wasn't sharpened for web optimization. Like you, I use the TK panel to output sharpen my images for web. I can proof delay the images so that if someone wants the full, hi-res image for a bigger print, I can make that available to them, but unfortunately, Smugmug doesn't allow proof delay for digital purchases. I'd like to be able to provide my images in a format that suits a one-size-fits-all. I hope this makes and appreciate your feedback!
Ответить
I rarely subscribe to channels. Not for any particular reason, I just almost never do it. Your videos are too good not to subscribe to your channel.
Ответить
Nice video! Do you have any tutorial of how resize Raw images for small sizes (300 kb) and have a HIGH quality for internet even when you zoom in? I never saw any tutorial explainig how to do that. Would be a great content for all of us. Thank you. Keep going the amazing work!
Ответить
Hi Sean. Thanks for the video. I am a real estate photographer, 90% of the images are interior. I use a 20mp camera. How would you translate the landscape sharpening settings for interior photography. Thanks again.
Ответить
Why does it seem to me that the words I hear from you aren't in sync with your lip movement? I don't intend to be critical but maybe it's something you can look for in your next video upload.
Ответить
You prefer smart sharpen over Nik.
Ответить
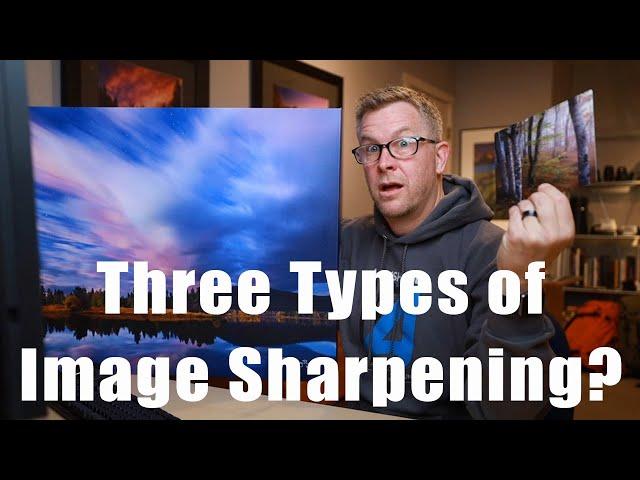
You aren't describing 3 "types" of sharpening, but 3 different times where you might choose to sharpen in your workflow.
Ответить
Thank a lot شكرا جزيلا
Ответить
As is often the case, nicely done Sean. Thanks for taking the time to organize and present the information.
Ответить
Upsampling instead of sharpening. I generally did no sharpening until I accidentally slid the sharpening slider on one of my shots. Details became visible that I had not noticed before., Still, I generally find LR's default input sharpening good enough. A panorama shot I tested a new camera and lens with seemed to lack detail. It was good but not great. Printing this to 24" (60cm) also looked good but not great. My printer set to 1,440x1,440 dpi, at the print size, needs more pixels than my camera produces. Without most of us noticing this, somewhere between LR or PS and printer, pixels are invented that weren't there originally. This I call upsampling.
At the larger print size or at a larger display than my 28" 4K, it matters how the upsampling is done. My position is it starts best with a non-sharpened image.
At 23.6 inches (60cm) and 1,440 dpi, we need 34,000 pixels in the printer, at the print head. The question is of course, where do we do that. And what intelligence was applied. Here I compared a simple app where my assumption is that the upsampling happens in the driver layer and the printer, versus printing from Lightroom and printing from Photoshop. In all cases using a picture upsampled to the 32,015 pixels needed for the full 60cm. Here I got the best - best detail resolution - result with Topaz Gigapixel. This application was not very mature in stability but when it produced a result I asked it to do, that was excellent. Better than Photoshop's built in algorithm. I am sort of disappointed that Adobe cannot give me this level of upsampling yet, and think Topaz has a couple things to address still.
The experience makes considering what to sharpen, when, why very relevant. It also indicates the relevance of the tool to use and in what order you do one thing or another.

Love the content...but your audio appears out of sync to me? Only channel this happens on...
Ответить
Hi Sean, great tutorial. I bet there is a strong demand on a class on this topic. I would highly appreciate one.
Ответить
Very insightful Sean. I had been wondering what you meant in previous videos by smart sharpening for printing. I myself need to dive a little more into becoming better at printing and sharpening for that process itself. The Tk panel web sharpening feature is fantastic. Thanks for sharing.
Ответить
Sean Great video! I use a Nikon D750 (24mp) and I'm new to printing. Primarily I print on metals, acrylics, and paper prints. I would like to be able to print sizes like 30x40, 40x60. Is there any reason the files from a D750 couldn't do this? I understand how I process plays into that as well. Thanks
Ответить
Excellent topic and video. Very informative and incredibly well explained.
Ответить
My step number 1 is to start out with my sharpest lens set to f8 or f11. DXO Mark's lens reviews will help figuring out which one that is. In my case it is the 24-70 f4 L.
Ответить
Great video Sean some great information there man😀👍✌
Ответить
Excellent video Sean. In past tutorials I have noticed that you turn off sharpening in the LR detail tab before making edits and exporting to Photoshop as a smart object. Is this recommended, or do you recommend adding input/RAW sharpening in LR? I usually add input raw sharpening as a smart object filter in PS after making all edits- now I’m second guessing 🤔
Ответить
Very well said. Also audio ≠ video.
Ответить
Thanks Sean . Learned a lot. Love and support from Pakistan. 👍👏👌
Ответить
Is it me or sound and video are not synced
Ответить
yeah Sean! helpful most indeed!
Ответить
Good stuff Sean 🤙🏻
Ответить
Nice tutorial, can you tell me how i can reduce noise with the TK7 panel?
Ответить
Killer video Sean, this is why your Sean freaking Bagshaw... thorough and articulate
Ответить
This is as I see it solid advice all the way through with good depth (blurring is part of creative sharpening etc).
I would note that there is nothing that can be done in an accessory software that cannot be done in Photoshop alone, and learning to do it in Photoshop adds fundamental understanding while maximizing your value in the cost of renting that Adobe app.
Some thoughts, perhaps obvious (sharpening is indeed a very detailed process):
View at 100% to sharpen the archive file and and at "print size" to sharpen print output (presuming you are doing either manually not via an app, in which case it does not matter).
Set your Photoshop preferences to display the (magnification tool) option "print size" at real print size! So for instance when your Photoshop border ruler (cntrl/r) is set to "inches" or "millimeters" rather than "pixels," a real ruler held up to the screen will match it exactly! You do this via numerical entry at: Edit/Preferences/screen resolution/units & rulers. The preferred number will be about your your monitor width in pixels divided by it's width in inches. Ballpark that, then check & adjust by using a a real ruler held against your on screen Photoshop ruler, to make sure the Photoshop ruler (set to inches, mm, cm) matches it exactly.
My preference setting is 94 px/in for my 1920px wide Dell 24", and a steel ruler held up against my screen ruler (set to mm, cm, or inches) matches exactly WHEN (an only when) the image magnification is at "print size" via the magnifier tool.
Experts will know this already, but for non-experts it's quite a bit of fun to associate the real world (a real ruler) to your Photoshop environment via setting correct print size. PS you may find it's very close already and wonder why you are bothering, and you will also see "print resolution" in the preferences. The print resolution is a separate issue and can be adjusted for any print individually during a printing process.

Would you care to comment on Lightroom’s Print Module’s output sharpening? In the past I did what JP and Jeff taught but for the past few years relied more on Lightroom. Aside from sharpening, the Lightroom print controls are less refined than using Photoshop layers to tune contrast and correct color.
Ответить
Extremely helpful!
Ответить
That was a great, explanation on those sharpening categories. I have not experimented much with LR (or PS) sharpening; I just let the software defaults stay. But I have not yet printed much of my work either.
I always learn something from your videos. Thanks for your effort Sean.

Thanks so much Sean!
Ответить
As usual Sean, well done - great info, and well articulated/presented -- THANKS so much!
Ответить
Thanks Sean for reducing my confusion with the various types of sharpening. I'm off to watrch some of your other videos in my quest to learn how to prepare images for perfecrt lab printing - the trickiest part of my photography journey.
Ответить
So nice tutorial. 👍
Ответить
Well done. Good information.
Ответить


