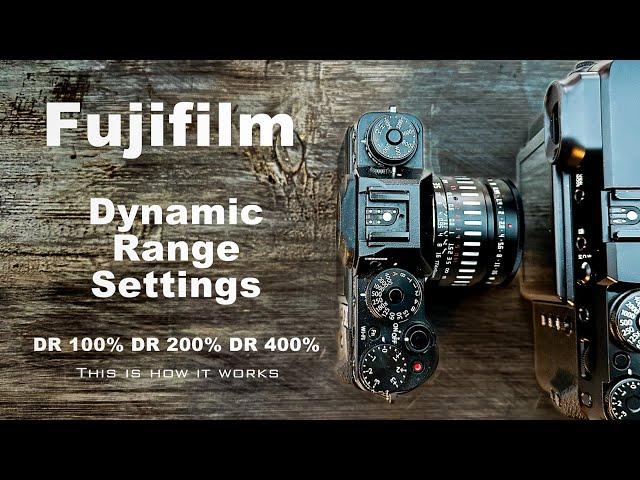
FUJIFILM Dynamic Range setting explained - This is how it works and when to use it.
Комментарии:

Human eye 20 Stops ?
Ответить
Where in the world are you getting this "GFX medium format is 7 times larger than a full frame sensor"?
GFX sensor is 43.8x32.9mm, while full frame is 24.0x36.0mm... So around 1.6 times larger, not even close to 7 times larger.

yeaaaaa I think auto everything is gunna work for me
Ответить
Can turn off Dynamic Range?
Ответить
Medium format is not "7 times bigger than a full frame sensor". Even if you go with some of the largest medium format film sizes, it's not that much. It's closer to 4x. Fuji's medium format sensor is smaller even than a 645 frame, and is only slightly bigger than traditional full frame sensors. Fuji's medium format is around twice as large (2x) as a full frame sensor. The focal length conversion is only .8 to go from a full frame field of view to a Fuji medium format field of view.
Ответить
Is this setting basically the same as exposing for the highlights and recovering the shadows in post, but doing it in-camera?
Ответить
Thank you so much for your videos Chris! Very well explained and helpful to me after I switched to Fuji from Canon and after a 5 year break from photography. Absolutely missed the feeling of holding the camera and now being able to take new images with the brilliant film filters Fuji came up with. Will definitely check out your other videos to progress further.
Ответить
so helpful, thank you!
Ответить
Thank you for your fabulous tutorial. Down to Earth, easy to follow explanation. Truly Blessed Explanation
RustyIron mike

I would say that it is rather the size of the pixels than the sensor, all else being equal. It is entirely possible for an APS-C camera to have more dynamic range than medium format, but that constellation of pixel and sensor size doesn't exist, with identical technology.
Ответить
So thankful for this, Chris! Your explanation made perfect sense to me. I've been leaving DRP on 100% because I didn't know what it did but now I understand!!
Ответить
Thanks a lot! Hugs from Portugal!
Ответить
Perfect video tutorial. Exactly what I was looking for. Thanks!
Ответить
Essentially this setting turns down the analog gain by 1 or 2 stops. You can experience the result by using a raw editor that does not automatically correct for this. I use darktable and if I shoot at DR 400 I will have to increase the exposure by 2 stops. This is not a problem because it will certainly protect your highlights. The tradeoff is a bit more noise in the shadows. Generally I think the tradeoff is worth it. Once you clip highlight sensor data it is gone it is much easier to recover the shadows. Most of the commercial software like Lightroom and Capture One will automatically compensate for this.
Ответить
Great tutorial! Thank you. Just to be clear, do you suggest making these adjustments based on each scenario of shooting (change every time) or do you suggest leaving the settings at either 100%, 200%, or 400% all the time based on simple preferences of exposition as a "default" preference setting? [EDITED] I just watched your most recent video on DR and I think the answer is there!
Ответить
Does this works for when shooting videos?
Ответить
Hi! How does this function work in auto? Carl-Magnus
Ответить
Basically crank it up to 400% if there are harsh highlights? And regular use either 100 or 200? I'm Curious how big of a difference there is between 100% and 200%.
Ответить
These latest videos are just so helpful. I switched from Canon 5D mark 3 last year to an X-T3 and am still getting to grips with it. Simple question, is it worth my updating to X-T5 when I can afford it?
Ответить
Learnt something!!
Ответить
Is it ok if I set the DR to auto and let the camera decide what DR?
Ответить
I want to highlight what I would call an minor inaccuracy -- processing itself is not responsible for the dynamic range of an image. The larger the pixels are in an image sensor, then the more accurately it can detect the difference between light and dark. This is the initial point where your camera can have a different dynamic range from another, so the more granular your sensor is, the more latitude (or the less aggressively) your processor needs to adjust the ISO to capture the desired dynamic range. Modern phones have very fast processors, with very good graphic units. A well written processing software (in the case of phones, your camera app) will fully leverage the graphics horsepower on the chip to apply effects to multiple exposures taken from the image in a short period.
The reason Fuji cameras have minimum ISO requirements for different levels of dynamic range is because increasing the DR value also increases the number of stops up/down the camera will take the extra exposures. By pushing these "bookend" exposures further, you get more total information. After these multiple exposures get processed, you keep the highlight levels of the lower exposed image, and the shadows of the higher exposed image, but composited on top of the middle exposure for the mid-range detail. People used to do this process by hand in Photoshop or Lightroom, but many cameras have it built in now.

Hi Chris, thanks for the explanation on this, i've never really used this feature to be honest! I often bracket exposures if i need more dynamic range but if there's movement in the scene this should be the ideal thing to use i assume? My question is if you're using DR200/400% would you expose differently? Favour the left or the right on the histogram for example? Thanks!
Ответить
So... Why not just leave it on 400 all the time?
I guess if you didn't have a challenging shot, and wanted as little noise as possible...

Hello Chris. I can't find words to thank you for your videos and especially new series on Fuji settings! I have been a long time iphone photographer but recently picked up Fuji XT-1 with 35 mmf2 to learn everything I can about camera photography, and this switch is quite overwhelming as you have way more buttons and settings to play with than on the iphone. Your videos are really something! Found you as I've been looking through the whole Internet to learn more on XT-1 and hocked on to your videos with simple and down to earth style.
Thank you again for the value and great content you put out, Cheers!

Thanks for this Chris. I'm new to Fuji since picking up a second hand T-X3. This video has perfect timing as I have been reading up on the DR and dual native ISO. It's quite a pill. Especially when you mix photo vs video. Here is my understanding after this video based on T-X3. ISO 640 should be acceptable noise. Use DR100 in situations with majority of shadow in frame. Use DR400 to protect highlights on a bright day for example.
Ответить
Hi Chris, thank you for the very helpful video. What I still don't understand is the difference between the settings "DR-P" (DR 100%, 200%, 400%) and "D Range Priority". The two settings are mutually exclusive.
Ответить
Thank you so much, as a new X-T3 user at last an explanation on DR that makes sense.
Ответить
Please correct me if I'm wrong but shooting raw there is no need to use the DR function. You could have achieved exactly the same effect by exposing for the highlights and then lifting shadows in post.
Ответить
Great, thanks for the information.
Ответить
I use highlight tone priority on my Canon cameras which does the same thing.
People scream about OMG your lowest ISO is 200 or 640 in the case of my Fuji cameras. I doubt anyone can tell the difference in noise but the noise is only in the shadow detail and not the mid tones or nightlight areas. Fuji noise looks pleasing anyway.

This is also in my old Fuji exr point and shoot and it’s amazing on that so will try on my xt4
Ответить
Chris as always bang on helpful info 👍 thank you
Ответить
This series on the detail of Fuji camera settings is most helpful. Thanks.
Ответить
helpful. thoughtful. thank you for the effort and the sharing. if i may: with the XT1, are you comfortably noise free at ISO 800? 1600? what about the XT2, noise free at 1600? (i have both the XT1 and XT2, and you were referring to the XT3 and the GFX cameras in your vid.) thumbs up.
Ответить


