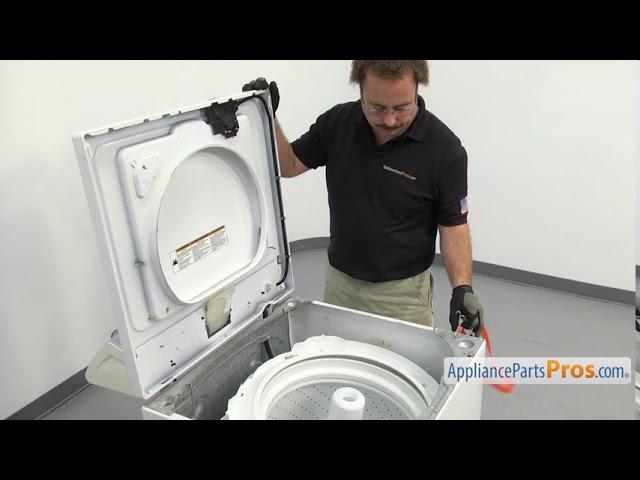
How To Replace: Whirlpool/KitchenAid/Maytag Washer Suspension Rod Kit W10780048
Комментарии:

Video is so well done!
Ответить
Thank you sir for this excellent video, it was super helpful! Long story short, I visited my senior parents out of state, the night before I was leaving the hook on a spring popped of washing my laundry. Fortunately, 1/4” nut driver did the trick and not parts were damaged. Great post!😎
Ответить
Having to run the rods into the bottom of the machine instead of being able to simply slide them into the base from above is a design weakness. Lying the machine horizontally significantly increases the time and effort required for this repair.
Ответить
A repair guy was charging me 270 . Found your video so wish me luck 🙃 Im a single mom trying to save money . Ordering the parts cause you made it look easy I think I can do it lol 😅
Ответить
I am doing this now but the drum is so heavy to lift.
Ответить
I need those hose fitting pliers. Probably cost $50.
Ответить
Thank you. It looks simple enough. Much appreciation!
Ответить
Thanks! Fixing to help my 83yr old friend save some money.....
Ответить
I like taking one out at a time
Ответить
Just wanna say I appreciate this video and the time it took you to make it. just helped me save a lot of money I don't have.
Ответить
Thank you! I followed step by step and use OEM....!!!👍
Ответить
How can u tell there bad
Ответить
I would calibrate it after.
Ответить
Very simple an easy to follow video. Actually doing this my self right now for the first time. Thank you so much
Ответить
Thanks for the video. A couple cuts a scratch later, and all is well. Saved the pos washer from the dump. And the expense of a new one. Many thanks!!!
Ответить
Thank you sir, great video!
Ответить
I took mine apart. I bought from amazon some brass shim material. (verry cheep) I lined the entire hole with brass shim. Then I slid my rubber into what is now a smaller tighter hole.
Ответить
Me again. Found the short spring/centering springs video you have. Hopefully, it'll help. 2 are mississing.
Ответить
Model WTW5000DW1
Problem Excessive shaking n banging while in spin cycle
It has 2 suspension rods with green caps and 2 with white caps. Are they perhaps the wrong one? If they're correct, which ones go where? Purchased used. Replaced with revised hub kit and recalibrate d. Shaking is better bit still some excessive. Leveled and repositioned laundry. Are there supposed to be a short spring attached to each corner of liner cap and the other end around the suspension rod. I only see 2. Not seeing the on your parts diagram.

Hubby and I worked together to get this done. Thanks!
Ответить
So we have rods for 2 years & the components came off of one of the rods. So can these components be put back together so we do not have to spend more money on suspension rods again?
Ответить
I used the clip end of my dog’s lease to grab the hook top of the rod and pull it up through the hole. Ha!!
Ответить
This video is perfection.
Ответить
Thank you for your wisdom. Couldn’t have done it with out you 🙏🏾
Ответить
I did this and it is still walking all over the place . What else can I try?
Ответить
Thanks!
Ответить
The PRO'S know... Thank You !
Ответить
What is the cost for this job?
Ответить
muchas gracias por este video
Ответить
Excellent video! I have one suggestion. When lifting each rod to install the new bearing, I found I couldn't grip the rod tight enough and it would slip down before I could get the bearing on with my other hand. Using a rubber glove on the hand holding up the rod allowed enough grip to get the bearing on.
Ответить
I used the hook on the old suspension rod to help thread the new ones in
Ответить
👍🏽🙏🏾🇯🇲
Ответить
Knowledge is power. Thank you . What a great video! You’re a good teacher! ❤
Ответить
You can also use one of the old rods to hook the top of the new rod to pull it through the top.
Just slide the old rod hook end through the socket hole, connect the top of the new rod hook end to the old one and lift up on the old rod to pull the new one through the socket hole.

Thank you very much.
Ответить
Much respect for this man , I just got done replacing mine. Definitely exhausted , different kind of strength 💪 .
Ответить
I replaced all of mine from the top. It was a pain but it's doable
Ответить
Digging the guitar solo
Ответить
Very thorough video. Thank you so much.
Ответить
Is rhis the same with 400 series kenmore?
Ответить
Best instructional video! Thanh you!
Ответить
This is the absolute best replacement video ive seen thus far.
Ответить
I followed your procedure and found it was very easy.Job completed in less than 30 minutes. Thank you
Ответить
Yeah, this is simple and cheap, however be forewarned that there's another failure that can cause these symptoms that are seldom discussed in any of these videos and that's a Stator that has cracks in it. Maytag and Whirlpool washers with direct drive motors seem to have this defect.
Like many I did this repair and the washer continued its violent shaking. Then I did the bearings and seal...same thing... Wifey is now discouraged and pizzed.
When I did the bearings and seal I noticed a few cracks in the stator housing. I read one or two posts on google regarding this but was skeptical that this could be the cause of the violent shaking and was reluctant to spend $200+ for a new stator if it didn't fix the problem.
I removed the stator and placed it in an oven @275F for an hour to open the cracks up and afterwards used epoxy (loctite 9462) to fill the cracks when still hot. I then placed a band clamp around the stator to pull it together and let it set for 12 hours+.
Wala, the washer ran like new. No shaking. This is a temporary fix and have since replaced the stator with a new one on amazon. All is right in the world now (wifey is happy again😏)!

Greetings do you have to remove any back panel screws before lifting lid???
Ответить
Springs on the support rods ? My kit came with springs . Are the springs to keep the rods centered ?
Ответить
I have a top load Kenmore 25132 that was recently repaired. Dampening rods . For some reason it spins violently. Bangs real loud. Sounds like it's gonna break apart. What can be the problem?
Ответить
Good job thank for the tips
Ответить
Great video. Thank you for sharing. I installed them with help form my son. I would pull up on the suspension rod and he would place the plastic bearing. I struggled a bit since the new rods have so much tension. I used an old suspension rod hook to get leverage and pull the suspension rod through the hole. This actually made it easier. Although it was a bit challenging, your video was perfect plus it feels rewarding knowing that I installed them myself. Much appreciated.
Ответить


