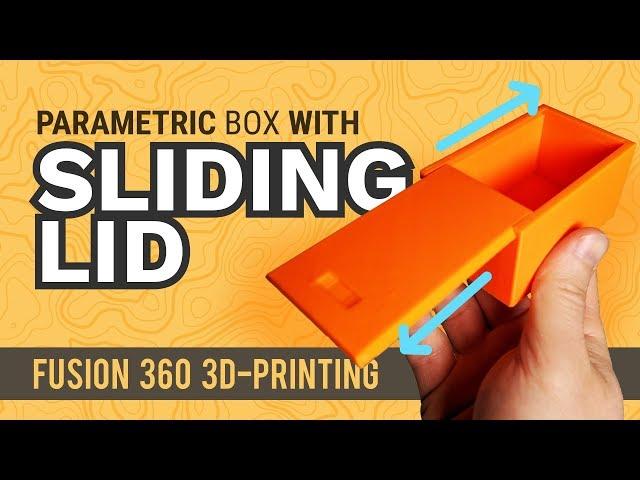
Sliding Dovetail Lid for 3D Printed Box | Fusion 360 Tutorial
TIMESTAMPS
0:00 - Creating a sliding lid in Fusion 360
0:27 - User Parameters preview
1:08 - Creating the box
1:50 - Making the box hollow
2:43 - Projecting the edge of the box
3:29 - Cutting out the dovetail shape
6:00 - Testing the dimensions
6:23 - Creating the lid of the box
7:45 - Factoring in the clearance
10:15 - Model Parameters into User Parameters
12:45 - Creating the thumb hold on the top
14:13 - Adding a sliding joint to the lid
TUTORIAL RESOURCES
1. This tutorial's resource page ➞ https://ProductDesignOnline.com/34
2. View my checklists for Fusion 360 beginners ➞ http://bit.ly/f360checklist
3. Join us on Patreon ➞ https://www.patreon.com/productdesignonline
TOP FUSION 360 PLAYLISTS
http://bit.ly/learn-fusion360
http://bit.ly/woodworker-playlist
http://bit.ly/3D-printing-playlist
http://bit.ly/sculpt-playlist
SUBSCRIBE for more high-quality Fusion 360 tutorials! ➞ http://bit.ly/sub-right-now
MY PREMIUM COURSES
2 Months FREE ➞ http://bit.ly/courses-free
QUESTION
Have a question about Fusion 360? Post it in the comments section of this video!
HELP THE COMMUNITY GROW
Speak another language? Submit a closed captions translation and help me continue to make CAD education more accessible ➞ http://bit.ly/translate-this-video
FACEBOOK GROUP
Join and share your projects with the growing community of Hobbyists using Fusion 360 ➞ https://www.fb.com/groups/fusion360hobbyists/
DISCLAIMER
This video and description contains affiliate links, which means that if you click on one of the product links, I’ll receive a small commission. This helps you support the channel at no extra cost to you and allows me to continue to make videos like this.
—
#Fusion360 #ProductDesignOnline #3Dprinting
Тэги:
#3d_printed_box #sliding_dovetail_box_lid #3d_printed_box_with_lid #sliding_3d_print #fusion_360_parametric_box #fusion_360_sliding_dovetail #fusion_360_impossible_dovetail #impossible_dovetail_3d_print #fusion_360_for_beginners #3d_printer #3d_printer_time_lapse #3d_printing_ideas #product_design_online #kevin_kennedy #fusion_360_tutorial #tutorials_for_fusion_360 #best_fusion_360_tutorials #best_fusion_360_tutorials_for_beginnersКомментарии:

could add a nub under the thumb recess, so it locks the lid underside with the back wall
Ответить
Min 3'48", spend like 20 min trying to get that squared figure and just couldn't do it following you step by step.
Had to go to another video to noticed you skipped a step dumbass, thanks for wasting my time

So I printed this box and it worked great. I wanted a longer one and with one dimension change in the main box sketch everything was adjusted correctly!! So awesome. Great job explaining this concept.
Ответить
From all the information about Fusion 360 on the web I've seen so far, your videos are the best. Your way of teaching is calm, patient and elegant, your explanations are clear and easy to understand. I do the exercises along with the video side by side and I'm always learning something more. Congratulations!
It's just an idea to prevent the lid from coming off, I put two small pins, one on each side of the front of the box to be printed separately and placed after the lid. The top of the pins can be flush with the thickness of the cover and the pins protrude about 1.0mm into the case. They were virtually invisible and prevented the cap from coming off completely more easily.

Thanks!
Ответить
This was cool.
I have it printing right now. The lid came out nicely. We will see how well the .25 offset works on my max neo.

Just note, when doing woodworking, standard dovetails are generally between 7 and 12 degrees (from vertical).
Ответить
New feature request: Fusion360 should let you type in parameters which don't yet exist while creating an object, and allow you to add them on the fly. Would save a ton of time!
Ответить
Kevin has a knack for choosing projects with common uses.
Ответить
To stop the lid from coming off, I would think you could just put either an additional track on each side of the sliding parts, and then little "wings" at the end that stick out and run along the track. Various ways to do this, and difficult to explain in comments though.
Ответить
where do i download software?
Ответить
In a HURRY? Not that easy for beginners!!
Tell how you can print/select separate.

Had to subscribe, this idea of creating and printing random stuff is great cause sometimes there is that one thing you need to find out how to do on your design and this type of tutorial might cover that one thing you need help with. Thank you!
Ответить
Great stuff. I learnt how to use Fustion 360 without looking at a single tutorial because most of them were awful. But yours are amazing. And I've also learned some new stuff or things I've never thought of using before.
Ответить
Very informative video ! I learned how to project onto new sketches!
Ответить
Can you do a cutout for the 3 sides? I was thinking of putting something that the lid will snap onto and keep the lid shut.
Ответить
You could create small nubs near the front of the lid and offset a spherical shape so it locks into place when the lid is fully in, you'd definitely want a good handle for that method. Alternatively, you could create a pin hole within the box edge where a securing pin could be inserted into the lid to hold it in place, changes to the lid style would yield better results for that method however. Also i find Curved lids are less likely to fall out easily because of the curvature, it depends on the shape, e.g. if the lid was slightly angle downwards towards the back end gravity would help keep it in place as opposed to a "perfectly level" slide track letting friction be the only pull force on the lid. creativity's the limit.
Ответить
I wonder if you shell the outside it would be easier too determine the required parameters for example you could then use the size of pack of cards too be the size
Ответить
I loved the content and followed the video a few times, i just cant get my constraints to work when I modify the size of the box the rest doesn't go with it.
Ответить
karkalicious definition make terezi loco
Ответить
When adding the divot for the lid, in extrude the cut option isn't there. My only options are new object or new component. Any help please?
Ответить
Why does he sound like nile red
Ответить
Cool tutorial and I'm going to print a few. I changed the design a bit. Rather than a depression for the lid and raised it. In my slicer program, I cut off the raised piece and duplicated. The second one will be glued on the bottom of the lid to act as a stop. Thanks
Ответить
Your fusion tutorials are the best! The solution I used to keep the lid from sliding off are slots for 3mm diameter 3mm thickness neodymium magnets. I find the way the components snap together to be very satisfying.
Ответить
Dude! This videois great! So many Tips and Tricks I have been doing the hard way in Fusion!
Ответить
Thank you very much for the instruction, sure beats fumbling through learning on my own.
Ответить
Thank you for this excellent instruction. I managed to reproduce it successfully !
Working further on this topic, I've found another way of doing it, which, if you don't mind I'd like to share with you:
Instead of working with offsets on the sketch I tried the following:
Box and lid as seperate components, as you do it.
Create the box as a hollow, complete cube.
Create the lid with triangular profiles on the sides, sketch on the xz plane, extrude along the y axis.
Cut the lid from the top shell of the box using combine with the lid as tool and keeping the tool.
This creates a box with a slot for the lid, but without any gap, so it won't slide , of course.
The use the offset face command on the box's 4 slanted faces where the lid slides in. A value of -0.1 mm works for me (0.20 layers).
It gives the same results , but I found it a little bit easier.

If it do some tapper minimum degree. It will be very much easy to . The cover doesn't escape from that.
Ответить
is there a way to link components? when i change the dimensions of the box the lid doesnt change
Ответить
Thank you for this.. Im new to all this & it helped loads.. 5*
Ответить
i literally love you i had a school project and this solves it all you are the best for real
Ответить
I want to hang a project box flush on my wall with no screws visible. Gonna try this design and screw the lid into the wall and hope the box slides over it nicely
Ответить
Once again, another amazing video. Amazing Fusion 360 tutorial series. Learned a lot!
Ответить
I love having examples like this because I can use it to learn by, and I have a functional product when I'm done. I'd like to add a tab to snap it shut when closed. I'm going to figure out that solution next. Thanks Kevin for a great series.
Ответить
Thank you for a great tutorial. I used the basic concept to create a channel and diffuser for LED strip lights for a project I am working. I can adjust the parameters to fit different width of LED strips. I this is my first project I have modeled from start to finish!
Ответить
Lid stopper idea: make 2 or 1 small hook(s) ( like a fishing hook )on the beginning of the lid. once inserted with a litlle force ( pla is a little bit flexibel) you wont be able to remove the lid “ >” > insertion only lifting up with a knife to overcome the highest part of the hook
Ответить
Use the Divot approach to create a bump on the underside to prevent sliding all the way out. There will be enough flex in the material to assemble it.
Extrude using a taper to create a flat cone type feature that allows it to slide on but not off.

Sorry I could not understand the constraint. You are doing this at high speed then everytrhing is not clear please can you give some details how you get the constraint for the form of the lid
Ответить
Happiness comes when you invest and get paid.. my heart is full of joy and happiness ever since I started investing with MRS LINDA HENDERSON trading with MRS LINDA HENDERSON have been a great opportunity for me and i have been receiving my profit constantly.
Ответить
I think for preventing the lid out of box, you can add two symmetrical shallow cut at each side of the sliding rail then extrude two short pins at bottom of trapezoid, so when lid fully slide out, the pin will stop it off from box.
Ответить
How can I print the box then the lid separately?
Ответить
Hi Kevin, awesome tutorial! I'm having problems with the ellipse. It's blue and not constrained and I can't figure it out. There's a glitch in Fusion 360 for the ellipse. I think it might be the top of the trapezoid line won't hold in the sketch, by the time I get to sketching the divot. ,
thanks,
Ron

You make the best tutorials for any software I've ever seen! Please keep making these.
Ответить
I reduced the tolerance from .2 to .15 and the lid was still loose. So, then I printed off just the lid with a .05 tolerance and with a very light sanding I got a very satisfying friction fit. Hope this helps.
Ответить
Man, this is quality content! The only downside is that I learn how wrongly I've been doing things in Fusion
Ответить
Thanks for fantastic videos. Realy helps. Any idea how to slide lid in curve? I try to make a box for coffee filters. Happy new year.
Ответить
![[FNAF] [C4D] Freddy and Friends: Birthday Bash 2024 [FNAF] [C4D] Freddy and Friends: Birthday Bash 2024](https://invideo.cc/img/upload/Y3JtdF92US1mYjc.jpg)


