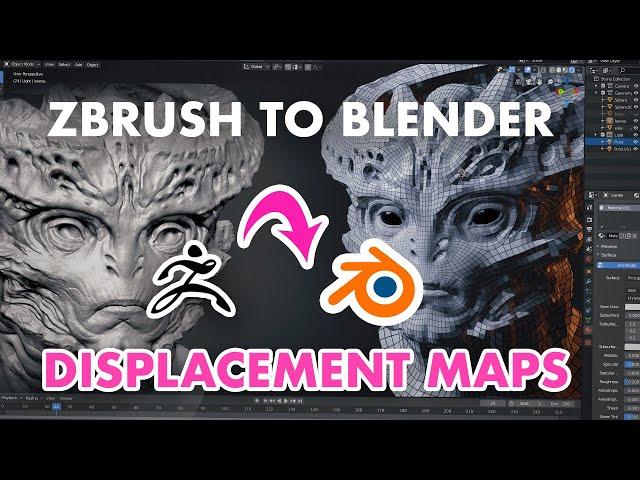
ZBrush to Blender 2.8 Displacement Maps - Ultimate Guide
Комментарии:

nice tutorial. my question is: does it matter which subd i will export from zbrush? you took subd 1 but in blender it shows every detail til subd6. so it seems like it doesnt effect it this much, right?
Ответить
man, nothings working, i tried this with a GOZ/GOB multi subtool model i have. but i cant seem to get the details projected with this method and also the displacement mode method. What do you think is the problem? im using blender 3.4
Ответить
Will you guys make a tutorial below?
sculpting hi-res in blender 3.5 > retopo > bake displacement map from hi-res sculpt > apply displacement map to the retopo mesh > render with cycles)

yuo can set the scale in blender, for example my zbrush models tend to be a hundred time bigger in zbrush that blender, so importing back in I clamp the scale to 1 and set the displacement scale to 0.01 in blender. works fine.
I also have blender set to unit scale of 1.0 and cm , so my head is real size ie around 25 cm from chin to top of head
setting the scale to ,01 in zbrush does not seem to work in my experience, I just leave it at 1

hi flip in new version of zbrush i can't do this bcz first need go to tools and make uv unwrap and create displacement map and export it like in video of you
Ответить
Thanks for the tutorial, I learned a lot from it, love how clear it is!
Ответить
There are so many things in ZBrush that make me wonder why? ZBrush has been out for a while and yet it seems like they haven't bothered fixing bugs I'm finding that have been around since the release of those features. Projection Master for example....I've found 3 bugs that people posted questions about like 7 years ago.
Ответить
Amazing stuff, by far the best approach to explaining things without confusion!
Just wondering if you choose blender over cinema for any reason? I’ve been using cinema for a few years now but are seeing more and more people opting for blender and I’m noticing tools that don’t seem to even be available in cinema,
Thanks again!

Cinema 4d users can do the same instead of blender... 🙂
Ответить
This kinda works but I get a few janky artefacts on my model. Any ideas why?
Ответить
So does anyone els, Blender Crash on render with Displacements. I have a character face. low ( medium) polly. a disp ,ape. followed all the steps but Blender 3.1 Crashed every time.
Ответить
Thanks that was really practical!
the question that has been on my mind is:
could we make the displacement map inside Blender instead of ZBrush?

Thank you!
Ответить
Thanks. I'm having an issue with the texture map lining up with the displacement. I know you do not cover the Color, texture map in the tut. I was wondering if you can help. Im exporting all from Multi map exporter. its off slightly. here is a link to the comparison.
Ответить
Awesome tutorial.
Also want to put this here in case someone has these issues for any reason.
1) If you import your model and its scale is set to 0.01 (or anything other than 1), and you happened to apply scale - Simply set the Strength value on your displacement modifier to 0.01 to get the correct result
2) If your height map was a PNG or something, by default its Color space would be set to sRGB. Make sure you set it to Raw/Non-Color

This is great ! But a video about how to have the model uv unvrapped in zbrush would be cool !
Ответить
Thanks for the instruction very much! The video caused another question for me though. What's the point of generating displacement maps if we are going to add subdivision levels again? Sorry if the question is too basic.
Ответить
Never EVER use smooth Uv's out of zbrush.(Unless blender smooths the uv's the same way zbrush does at render-time?). standard production practice is not to use smooth uvs in the multimap exporter. This will result in ugly seams around the UV borders. This is because the software used for rendering does not subdivide the model the same way as zbrush, the alogorithm is different.
Ответить
So when I create the maps and save it in the folder its not turning up for some reason
Ответить
Adaptive is really helpful for things that are spiky and curvy. Just fyi
Ответить
Please help ! Would you then retopo the model and bake normal maps from the mesh with the displacement modifier?
Ответить
Hellooo
When I try to save it into a folder it doesnt show anything in the folder.. I have no idea whats the problem.

How do you get UVs on a high poly mesh in zbrush?
Ответить
can we bake displacement maps inside blender? i.e., from high poly to low poly
Ответить
Hey guys, thank you so much for this tutorial. I'm a beginner and hoping to get my file size down a lot with this technique when I do skin textures in ZBrush. I am facing some trouble trying to export the map though. I'm following your tutorial and click export all maps. But no file appears. I've tried TIFF and EXR but nothing appears. Any help?
Ответить
@Flipped Normals So you showed how to get one subtool into blender. Great. But how many of us have models with just one subtool? How do you get an entire creation made of multiple subtools into blender? Is there a way to do it all at once? or do you have to import every single subtool individually? What am I missing here?
Ответить
How to export the fibermesh from zbrush to blender particle system
Ответить
how do i get the uv?
Ответить
I'm trying this out with a bust model that is ~1.2m tall in Blender; exporting a 32 bit map(confirmed by opening in photoshop) gives correct displacement for details but also shows some stair-stepping effect. Examining the image, the range is very narrow around 50% grey, I get a stair stepping effect with enough subdivisions and if I use levels to view the range (tiny spike around 50% grey values) in photoshop it also has the stairsteps.
Ответить
How would you use this as part of a full workflow with a program like substance painter?
For example, say I have a high res character bust that I sculpted in ZBrush, and a low res retopologized model I made in blender. The high resolution mesh has low to mid frequency details sculpted in, small forms/muscles, wrinkles, etc. From there I would want to bake a displacement map and bring it into Substance Painter to both create the skin materials and add the finest wrinkles, pores, bumps, etc (overkill to sculpt those in ZBrush imo).
From painter I then need to export texture maps and either a very detailed displacement map with all the small frequency detail, OR, a displacement map with low-mid frequency detail + a normal map with the high frequency detail. This then needs to be added to the model in the main 3D app (here blender) and display the combined details properly.
There is very little info out there on how to go through the full workflow properly, do you know a way to get good results reliably?

can you do a full one explaining the texture maps also??
Ответить
great video, and it works! i remember this process being so difficult for me before. thanks guys!
Ответить
This has been incredibly useful for me to understand. An hour ago I had no idea about anything involving retopology! This, plus a couple of your other videos, have been a godsend. Amazing work!
Ответить
Is there a video on the whole UV border issue?
Like Zbrush exports displacement maps with purely frozen uv borders, while the subdivision modifier can only do linear or smooth borders.
Are the seams on this just hidden very well or how did you get around that?

Hello @Flipped Normals. I have a problem with baking displacment for blender. I made geometry using dynamesh, then i used subdivision for more details. After that i copied the high poly mesh and Zremesh it for low poly version and i used Subdivision again for projecting details from High poly to low poly. Next to i tried to bake displacment but there is a problem. When I exported .exr displacment for blender it wasn't work at all. Or it was a black image or with only a little information (and in wrong direction). I tried to export tiff file as displacment it works better but still not good. It generate information on mesh but there was a mesh artefacts because of that. I tried this map in substance painter and it worked well. Idk why there is problem only in blender. Could You something tell me about that? Thanks. Regards.
Ответить
is it possible to do this all within Blender? like with a model you have sculpted and done the retopology for?
Ответить
This is not working for me. Its bullshit
Ответить
My map exports as pure gray. I followed the directions to the letter. Why is it doing this?
Ответить
Amazing tutorial, I wonder if you have the GoZ Blender wouldn't this speedup the import/export workflow? Cheers!
Ответить
Surprised you guys didn't use or recommend GOZ/GOB for blender.
Ответить
Do you guys knows how fucking much I love you ?
Ответить
Amazing work in this tutorials, one of the main reasons I was relactant moving to blender was the integration with programs like Zbrush.
Ответить
I'm a instant fan of you guys. The blender 2.8 was a shock to my system but damned if you guys havnt helped helped me immensely. Im a hobbyist that started with blender In 2014. It shocked me then too. Graduated full sail in 2006 for CA. Maya was it back then. Blows me away how much work flow has changed. People getting in it today dont have a clue how hard it used to be. Love you guys.
Ответить
Yess !
Ответить
Do you know how to or if its even possible to bake displacement maps in blender
Ответить
amazing
Ответить


