Комментарии:

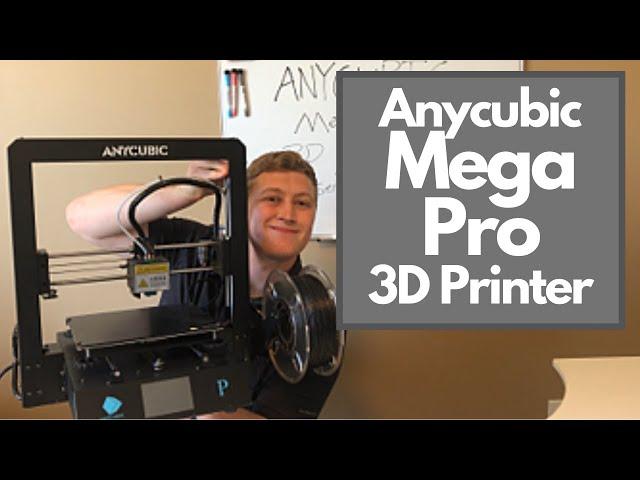
Got a chuckle from this review, as all your cons were from first time 3D printer user. But if you got it to work that is a decent review.
Ответить
I was wondering about the laser engraving aspect of this machine. Can you set where it engraves or does it have to be in the center of the base plate? Like I want to engrave on the corner of something that is too wide to off-set to where the corner is in the middle of that base, so was wondering if that was possible. Also, can you scale the size at all or is it fully dependent on the size of the image?
Ответить
Hola. Cómo podría reducir el ruido en mi Anycubic. Es muy ruidosa. El sonido es como un pitido.
Ответить
Just received my printer and looking forward to learning all about 3D printing. This printer was the best value I believe in Australia and I only paid $379.00 AU which is about $280 US, and its ranked fairly highly here.
This is my first printer and if I get into thins then I hope to use this printer to build my next.
The fan is noisey, but I am looking at changing that and I also want to build an enclosure to keep heat as I was told this would also help with build quality. So I've been told. I'm very much a newby.
So far so good. Keep up the videos.

Now does it have the titan extruder
Ответить
Word of advice, buy the Mega Pro 3D printer at Christmas time and you'll get it much cheaper(299.00). Thats what I paid for mine.
Ответить
You missed the absolute biggest pro for this machine a feature that even more expensive models and brands do not have. Heated build plate.
Ответить
you want to end the "wad of filament"? level your bed PROPERLY! a level is ok to make it level to EARTH, but leveling with the assisted leveling feature will get you "level" to the X-Z gantry. And it will get your nozzle height correct. using a level will NOT!
your bed adhesion is the problem. and the reason for it is when you start the print, your nozzle is likely not close enough to the bed to give you that good first layer adhesion. I have a Mega S (the Pro's predecessor) and I have printed 2020 T-slot that is 100mm high, and have no issues at all.
I level my bed completely manually as my Mega S doesn't offer assisted leveling. I use a .33 mm thick business card. I home the Z axis... then using the front panel controls, I bump it up 3x .1 equalling .3 mm. I go to each of the 3 corners and turn the wheels until I can slide the card under the nozzle with some dragging. (this is a feel thing.) When I have all four corners feeling the same, and have good drag.. I know that my printer which believes the nozzle is .3mm away from the bed, (.1 x 3 right?) is now set to be .3 mm away from the bed. the drag gives me that extra .03mm from the card's overall .33mm thickness.
So now when my Z axis is homed... it is 0.0 and my print jobs start with a 0.2 mm first layer always.... so when that starts... my layers will be .2mm as my nozzle will be set to .2mm height. This coupled with a 60 degree bed (which is the ideal temperature for the ultrabase surface to open up its pours to allow filament stickiness. will give you better adhesion, which means the part won't break free in the middle of a print job... and you won't have a spaghetti factory.
NOW, that little bulb at the end of the filament that prevents you from pulling it out... That is caused by the hot end design. The bowden tube that is in the print head, butts up against the nozzle, and on retract actions, it CAN get pulled back a little which creates a gap. PLUS the tube is not great for managing heat creep... so the filament gets warmed inside the tube and swells. I have modded my hot end, so that I'm using a capricorn tubing insert that is held in place by a printed washer behind the push coupler, and this makes it so the tubing is held in place behind the nozzle so no gaps. Also the capricorn tubing is better quality tubing that resists heat more... so no heat creep into the tube. No swelling and I no longer have the bulb of filament to squeeze through the tubing and rips out the bushing at the bottom of my material feeder. The pro has a different extruder feeder than the S but the same solution would work here.
I could go on about calibrating your extruder to be the ideal temperature for the filament you are using, so that you actually have to dial down the flow rate to get a perfect .4mm wall line (.4 is the diameter of the nozzle. Having this ability makes it so much easier to add a little flow to get better squish (layer to layer adhesion.) You get this correct, and stringing goes away (meaning you won't have to crank up the extraction setting which is horrible because you pull too much material out of the hot zone into the cool zone, and it causes clogging and jamming, and that gap I mentioned before. 4-6mm should be plenty of extract to lift nozzle pressure which is what causes the material to ooze out of the hot nozzle.
Congrats on getting started into the world of 3D printing... You'll be amazed at how much there is to learn, from the ground level. I know it's tough to hear, that you spent all this money on a printer that isn't ideal out of the box... it just isn't. But I look at it this way. I paid just over $200 for mine. I've put some time and money into it to improve things (I'm not done), but in the end, it's currently performing on par with +$1,000 machines. I may have an additional $50 into it. If you want a perfect out of the box machine, you're going to pay a whole lot more for it.







![[FREE] HARD CHILLINIT TYPE BEAT "COMPLICATED" [FREE] HARD CHILLINIT TYPE BEAT "COMPLICATED"](https://invideo.cc/img/upload/TWUtSExlWDVwdng.jpg)


