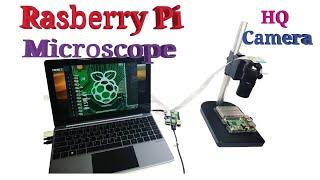
Review of Raspberry Pi Microscope - Using official HQ camera with Hayear microscope SMD soldering
Review of a Raspberry Pi Microscope from Pimoroni.
Microscope stand with 0.12-1.8x lens
This is a professional quality microscope and stand from HiYear. It uses the official hi-resolution HQ (high quality) Raspberry Pi camera which mounts on top of the microscope lens.
In this video I show an unboxing, assembly and then my first steps in trying out the microscope. If you wish to skip the unboxing then you can do so, look for the timings in the contents below.
The main thing about this review was discovering just how much light is needed to use it correctly. Once I got the lighting correct then I was able to get some great views on the camera. I do suggest you look at some of the later photos from 17:21 onwards and at the very end of the video where you can see some really good images when I added more light.
I've looked at this from the point-of-view of a maker or electronics hobbyist looking at how you can use it to inspect solder joints, assist with SMD soldering or reading component part numbers.
For more details see: http://www.penguintutor.com/news/raspberrypi/rpi-microscope or you can buy the microscope from https://shop.pimoroni.com/products/microscope-stand-with-0-12-1-8x-lens
Great fun and could be really useful for reading the codes on integrated circuits, soldering and other hobby tasks.
Contents:
00:00 Introduction to Raspberry Pi Microscope
00:53 Unboxing the microscope
07:54 Connected to a Raspberry Pi and Nexdock 2
10:10 Reading the writing on an integrated circuit (IC)
11:31 Importance of lots of light
13:03 Putting an Arduino under the microscope
14:23 Can it be used for soldering?
17:21 Adding more light to the microscope
18:34 An even brighter light for optimal viewing
19:43 Summary and captured images
Тэги:
#raspberry_pi #microscope #hq #hi-resolution #camera #official #stand #magnify #magnifying #photo #images #raspistill #arduino #uno #smd #solder #soldering #tweesers #tweezers #model #making #hobby #craft #zoom #tiny #intricate #detail #model_railwayКомментарии:
Gymnastics
Wild N Free Dancing Gymnastics
Top 10 Best Architects of the 21st Century
Civil Mentors
Народний аматорський жіночий камерний хор Gloria
Vitaliy Voychyshyn
Ron Paul Explains Campaign For Liberty
mercen144
Making a *sorta* Historical Briar Rose Costume
Rachel Maksy
Testing If Lovable Can Build Lead Gen Websites #webdevelopment #website #ai
Income stream surfers
1973 Firebird Formula Walkaround with Steve Magnante
High Octane Classics


