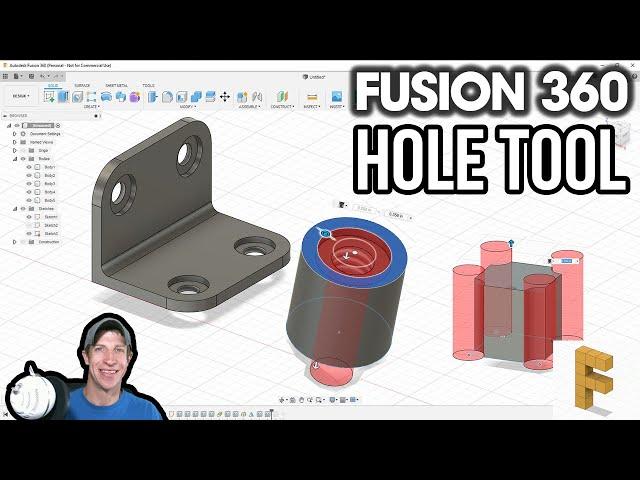
Autodesk Fusion 360 HOLE TOOL Tutorial
Комментарии:

been watching your vids past few weeks. great stuff. side note: you give off jim varney vibes, he was awesome.
Ответить
Thanks so much! I needed the modeling but didn't know it ! HAHA I thought it was the the threads were too small, but someone said it would work! Now I see what I did wrong!
Ответить
Yes all holes fcking straight.
Ответить
thatwas not a tutorial.. more like an oveview.. did not learn anything.
Ответить
AWESOME video, solved my issue with placing holes measured by my caliper on all 4 corners. YOU ROCK! [liked.saved.subscribed=True]
Ответить
🎉
Ответить
One command I was missing "Tangent Plane"! So simple but it escaped me! Thank you!
Ответить
god i hate this software
Ответить
i forgot to like
Ответить
Thank you. When I try to add a reference, no distance comes up, the hole just jumps to the middle of the shape. I appears you cut. Did you have to change something to get the reference distance to come up? I did everything the same as you.
Ответить
damn.. I've been doing this the hard way this "whole" (no pun intended) time with sketches and extrusions... Thanks for the video. Super easy!
Ответить
Thanks! Subd
Ответить
I’d like to see a way of having a hole pattern Then copying and pasting that pattern along an object at centres . An example would be whole patterns along the side of a steel stringer for treads on a staircase . That would be hugely helpful to me .
Ответить
Just so simple,so easily understandable.
Fantastic!!!

Hi, thank you for uploading the tutorial firstly. Can I ask for some help though. I want to make a hole with a flat edge for a stepper motor. What's the best way to do this?
Ответить
Thanks it was very educational I have a cnc machine with horizontal spindle and I was looking for how to use it and how to draw a hole on the piece but not on the surface if any one can guide me I will be thankful.
Ответить
I like your videos and I like that you always look like you're taking a shit
Ответить
So, I notice that the "hole" function does not work on a flat (4mm thick) surface. It cannot find a side, and I'm not willing to risk an extrusion fault. What do I do
Ответить
Great video
Ответить
Tapered Holes?
Ответить
OK you should really clarify something when you choose clearance whole it cannot be tapped to the size that you want the screw to fit in because they screw will just slide in and out of that it's a clearance hole it clears the entire dimension including the thread! You probably meant this to be this way but it kinda sounded like if you just wanna make the whole ready for being tapped you can choose clearance which is incorrect
Ответить
i kind of figured my self how to make that hole , but that tip how to came back and edit that was realy helpfull. i was strugling with it a lot. :-) thanx
Ответить
Awesome video! Very helpful.
Ответить
Hi I actually am trying to figure out how to set the angle of the hole. Would I create that plane and I suppose rotate that to the correct angle? The 2 faces I want to place a hole through are not parallel .
Ответить
is tois tool avalible on cura?
Ответить
Can someone help me . I want to select the distance from the edge of the circle, and I can't. allows me to select only from the center of the circle.
Ответить
Hey. Thanks for the tutorial. One thing that's missing is how do you create an angled hole?
For instance, in the cylinder, I want an angled hole from the flat top surface to one of the curved edges so I can thread a wire through from one side to the top. How would you do that please? Thanks

There is one thing i hoped to see in here. If i extruded from a sketch, how can i place multiple holes on the sides of the extrusion, since there won't exist a sketch of this.
Ответить
If you have two materials next to each other and one has already a hole in it- how do you make another hole right in the center of existing one in the next material?
Ответить
Thanks for the vid! :D
Is there any advantage to using the "all" depth feature instead of dragging the arrow all the way through the part?

Justin - You should get back to making videos, or creating another channel. You do great work.
Ответить
fantastic. Needed to learn this so I could mount an arduino inside a game controller we're modeling in fusion. Thanks!!!
Ответить
Good video, thank you!
Ответить
Is there not a standard size counterbore, countersink, clearance dimension for certain size bolts, or do you have to always manually enter those values? For example, Solidworks Hole Wizard lets you select your bolt size and whether you want a loose, normal or close clearance and it automatically provides the correct values for your clearance around that fastener.. We received some Fusion 360 models and the holes were too small for the countersunk screws.
Ответить
How to create a hole that is angled to a surface, eg to connect two pieces together and the hole is 45° to a face
Ответить
You are a very good explainer. Please continue to create Fusion 360 lessons
Ответить
I learned so much from this one video
Ответить
what about rectangular hole?
Ответить
Is there a way to have a ruler show up all the time? Just as a reference?
Or a way to position stuff off the origin? Say I want to play one object at 0,25mm. And another at 10,25mm.. On the 2d plain.
One example would be something like this..
Let's say I make an object. Then I want to copy and paste that object a given distance from the other object or origin.

a deleted post from a question on making an 8 hole concentric bolt hole pattern.. with important addition
how to create a truly concentric bolt hole pattern... divide 360 by the number of holes... this number will equal what is called Pitch Degree....
the center of the bolt hole pattern will represent X/Y 0
The first hole represents 360 or zero degrees; the X coordinate for your first hole will be the radius of your bolt hole pattern.. and the Y coordinate for that first hole will be zero.
Each successive hole in the pattern is calculated with the Sum of pitch degrees for that hole.. ie. second hole will be calculated using pitch degree (360/8 = 45), 3rd hole will be calculated as second holes pitch degree plus one more holes 45 pitch degree.. 45+45=90, 4th hole will be the sum of previous holes sum pitch degree 90 plus pitch degree 45 = 135 etc. ...
NOTE: you need to add the pitch degrees instead of multiplying by the number of the hole you are attempting to calculate, because multiplying will not account for the zero or 360 degree placement of first hole.. it is possible to write this method in other ways.. but this is the best I know
the formula you use for each x and y location is as follows: X=Sum Pitch degree Cosine times radius of bolt hole pattern Y= Sum Pitch degree Sine times the radius of the bolt hole pattern.
as far as I know, this will give you as close to perfect X/Y Data for Truly concentric bolt hole patterns, as a math formula may provide.. .the rest is up to your equipment and skill.
Some wisdom of this Circle method... the Number of God... Zero and 360 (All) count... the alpha and omega ...nothing and the sum of all things had better be counted as a hole number.. .the unknown.. and the omnipotent... seem, in some circumstances, to be warrantless of regard, but in truth.... are whole numbers too... and if you count the known without respect for the unknown... you will end up with eccentricity ...misery, poverty, famine, tyranny... instead of everlasting life..... .Truth is the name all peoples genuinely worship...seek truly... find the name in all things.
what this video doesn't show is... if you go into sketch and select create point.... as with create circle... there is no DRO... no way to see where your mouse is located with precision.. no data entry field... no basics..... no responsibility...
New designers, creators, machinists, etc. ... are forced to endure psychological turmoil, at best, as their employers have been forced through financial need to give money and perception of legitimacy to fusion 360's irresponsibility.... anyone who cries out will be made to look like an ass and not smart..... and any one who tries to help may be caused to be resented, and will certainly be guilty of associating with and legitimizing irresponsible leadership. this platform doesn't have what your shop's bridgeport has.... but it is covered up in fancy crap to make assholes feel special and super smart... while laying waste to anyone honest enough to want anything representing a standard in industry to have actual coverage of the basics of the stuff that made all the rest of the bs possible.
Fusion smacks of the dishonest leadership of HAAS trying to dumb down the machinist in the name of making lower wage operators.... it gives credence to solid works over charging for their services.... and makes other fly by night operations seem legitimate.... it is irresponsible... it does not account for the first and last... and it does come with consequences.
I do hope you will correct it.... regardless... .the first and last does account for all things... all consequences... no matter how poor your math is.

Really well done here. Good explanation and hand-holding at every sub-step of tasks. Well done! This helped me a lot and I subscribed instantly!!
Ответить
I simply do not understand how difficult this is. CNC programming is generally done from the center of the part in a Cartesian coordinate system (Most blueprints are drawn from a single origin which is easy to place a part on relative to the drawing). Prints are rarely drawn from the perimeters of a part. - I do not understand why you cannot use a reference as the center and describe location in X and Y. There must be a way - do you know how to do. When I place points on a sketch - laborious and silly. It will not let me cut a hole in the negative direction if the sketch is on the bottom of an extruded part. Am I missing something? Known to do that.
Ответить
can you show the best way to measure and line up holes with physical objects for fastening plates or brackets to objects ext...
Ответить
Thanks for the video.... Very informative.
Ответить
Hi. Is it possible to build an array of 8 holes for example around the circumference of the cylinder?
Ответить
I need to create chamfered holes in a plate where the chamfer takes up the complete thickness of the plate. I find it the whole tool does not give you enough option to do this unless I'm doing it wrong. This is the first time I've come across this scenario where the chamfer is taking up the entire thickness of the plate and there's no vertical through whole following the transfer it is exactly at the point that the champions so basically the screw head is the only thing that is in the plate thickness I hope you can understand what I mean I've been tinkering with it for like an hour now and I can't get it to work it always adjusts to the thickness of the play and always leaves the smaller diameter exit hole with some vertical shaft it's frustrating as hell
Ответить
Amazing video. A question though - How can I "group" holes. For instance I have two rows of 4 holes each and I want to move them together, that they will maintain their spaces etc.. What is the best way to do so?
Ответить
Thank you... it helped me create some HDD brackets and a fan housing with built in connectors.
Ответить
this had to be the best hole video ! serious easily explained and very in detail thank you very much !
Ответить