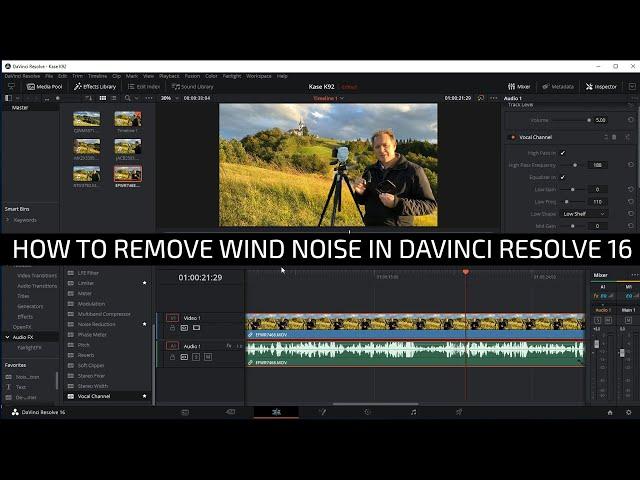
How to get rid of wind noise in Davinci Resolve 16
Комментарии:

Thank you!
Ответить
nice tutorial but sadly doesnt work for me, or davinci19!?
Ответить
Finally, thank you ! I have so many videos with this issue that it will be very helpful to "save" them.
Ответить
you absolute star , thanks
Ответить
Thank You verry good!!!!! Belgie
Ответить
Thanks Ian, you were right, this is so much easier than the other (non-existent) methods out there, specifically for wind sounds (I'm at a seaside location with strong winds)
Ответить
Thanks for doing this video, very easy to follow along with and implement in my own Davinci editing.
Ответить
Great vid
Ответить
Thank you !!!
Ответить
Thank you dude for making this. it helped me a lot.
Ответить
Is there something that can be done with an equalizer to make the voice less "tinny" after applying the high pass filter?
Ответить
Thanks, very useful!
Ответить
doesnt worked with my video
Ответить
I am one op four new subscribers. I like your voice. And the speed in which you talk. Not too slow or not too fast. Fantastic!
Ответить
It somehow doesn't work for me haha😂.
Ответить
Not that simple... Hardly any wind in your clip. This dosen´t do much even with a little 3 m/s wind.
Ответить
For people reading this after 2023, just click "Voice Isolation" and it'll remove any background noise.
Ответить
the wind in your video is not that bad, I had a video with very strong wind, I can still hear the voice but there is a lot of wind noise which makes it very unprofessional. But this option didn't help at all, I think, even put to max, the wind was still very present.
Ответить
This was an amazing simple video with straightforward instructions.
Ответить
Thank you for your job!!
Ответить
Thank you sir
Ответить
THANK YOU!! WONDERFUL tip!!
Ответить
You are a legend sir! Worked a charm. Thank you.
Ответить
Works better than anything else I have tried. Thanks for this. Some of the tools in DaVinci seem well hidden!!
Ответить
absolute legend
saved my live, ATAR media project had bad audio but now its fixed

thank you so much for this - SO incredibly helpful!!!!
Ответить
THANK YOU
Ответить
thank you so much, you saved my last video :)
Ответить
You can just use the equalizer in the audio inspector tab, select band 1, and then cut off whatever frequency needed
Ответить
Thank you very very, very, much. ❤️
Ответить
I went over the steps repeatedly. when I choose vocal channel I get the 1st window that you closed. I close, but then whether I put the vocal channel on the timeline box to the left, timeline above or on a single clip, When I open the inspector and click on the area I'd put it, I don't get that window that says vocal channel. It's audio but volume, pan, pitch, speed change, EQ. I ws on the Fairlight. went back since you were on edit and tried there and putting on the timeline, I didn't even get the 1st EQ box. Then I tried on a clip and got that and closed but then the Inspector had even less.
Ответить
thank you soo much!!!!
Ответить
Very nice of you to make this video! I wasn't quite able to eliminate all wind noise in my clips, but it's certainly an improvement. That's what I get for shooting with the internal mics, the wind noise is super loud and covers the entire low to mid spectrum. I already bought an external mic with one of these fuzzy covers, works great against wind!
Ответить
Thank you for the advice!
Ответить
hi do you have to have tolhe payed version davinchi
Ответить
It's the second time I found your video which again saved my life
Ответить
Thanks! Simple and straight to the point.
Ответить
That worked pretty well, thank you! The time and effort to explain is much appreciated.
Ответить
Thank you friend. As an outdoor channel, this is a God-Send!
Ответить
Tks - from Brasil
Ответить
Thank you a lot!!!!
Ответить
Thank you so much for this thorough, structured and easy to follow explanation! This is super helpful!
Ответить
Thank you for making this video! Very helpful!
Ответить
Still keeps on giving! Thank you!
Ответить
🙏🙏🙏🙌🙌🙌🙌👏 Thank you thank you!!
Ответить
Big thanks
Ответить


![X2: X Men United - Iceman freezes up Wolverine's soda (Funny Scene) [1080p] [English] X2: X Men United - Iceman freezes up Wolverine's soda (Funny Scene) [1080p] [English]](https://invideo.cc/img/upload/c3J6Qnc5dnotOGo.jpg)


