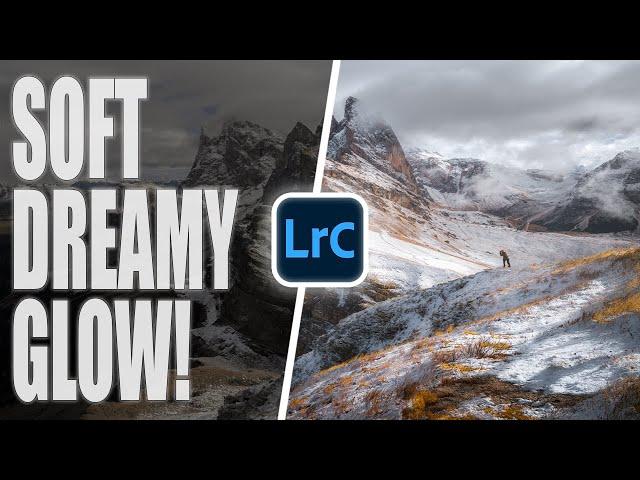
Try this Lightroom EFFECT on Your Landscape Photos! (you won’t be sorry)
Комментарии:

🌀Question: What do you use to edit your photos?
Ответить
Great info!!🎉
Ответить
This is great
Ответить
Why do you need for the full mask in step one. Why not just use a straight luminosity mask rather than a full mask intersected with Luminosity? I can only think that its to see the full effect and then use the intersect function to dial in the correct amount compared to the initial state when you have applied it to the full image. Have I missed something important?
Ответить
Hey Mark, why do you need to make an entire image mask? Won’t global adjustments do the same thing? Thanks, Dave
Ответить
One of the best videos I've seen (presentation and content). I've learned a lot and marked this video for future remind. Thank you
Ответить
Very helpful video. I’m a novice amateur photographer and just downloaded Lightroom. I have some, what I think are, great photos from a recent trip to Antarctica I’m going to try this on. Thanks Mark, really love your videos.
Ответить
Mark, this is very useful. An easier way to create the entire mask is with the linear gradient. You don't have to worry about changing brush size, opacity, or anything. Make sure your image is reduced on the screen. Then, place your gradient start on the right side, for example, just outside the image frame. Drag the linear gradient from left to right. Voilà! The whole image is selected.
Ответить
I don't think it improves the picture.
Ответить
I'm surprised you didn't make the final step setting this technique as a Masking Preset that can be tweeked on a photo by photo basis Mark. Think I shall do just that.
Ответить
With a linear gradient, surely you just have to pull the top handle all the way to the bottom, creating a hard grad and the whole image will be affected 🤔 Of course you're brush technique works perfectly fine anyway.
Ответить
Hi Mark: thanks for this video and all the other great work. I have found a flaw in this workflow, and I think there's a way to overcome it, but I don't know if that's what you did or not. Everything is fine until your step for global sharpening. Problem is that for most cameras, there has to be a step of "input sharpening" that is roughly close to what Lightroom chooses, plus or minus some tweaks. You essentially eliminated that step with the 100% sharpening with a high mask, and thus we lose the global detail provided by this input sharpening. Of course, this can be overcome by saving an intermediate version (as a tif or dng) that just has the input sharpening , and then you apply the whole Orton effect steps, including that global sharpening with a high mask as you do. Or one can do this Orton alternative in ACR on a globally sharpened image in PS, or some other combination.
I am not sure that this was your intent or workflow, so please comment.
Thanks.

Thank you. What a change I can do so much better. Photoshop isn't my friend lately
Ответить
Can this process be realized in PS Camera Raw?
Ответить
Mark, as always another informative and interesting tutorial. I am curious though what you used as your starting point. Had you already done all of your other edits such as the sky and the gold trees? And, then you just put the total mask on top of that? I may have to give this a shot.
Ответить
Thank you for the video!
Ответить
How do you find the "Orton Effect' after you create it??
Ответить
Great video thank you.. I preferred the Orton Effect on the entire photo, but that's just me...
Ответить
Why do you intersect? Why you do not go directly for a luminance mask? I don’t get it😖
Ответить
People have been using the Norton effect for years. Although this way does feel like it mimics it to a certain degree, I don't feel like it fully did. Can we call it an orton effect still then?
Ответить
Long time viewer Mark and I enjoy your videos but why aren’t you (and other photographers) including “and ACR” in your titles? As in, “Try this effect in LR & ACR…”.
Ответить
Nice! How would I make a preset for this? Just the effect and not the other adjustments?
Ответить
Very useful video! I use lightroom and struggle with Photoshop so this video was a HUGE help. Thank you for sharing.
Ответить
Great tips here, Mark; thanks. Some amazing new tools in Lightroom ... much better than the original Orton Effect process; blending two images, one sharp, one slightly out of focus
Ответить
I opened some of my older photos and rewatched this video and applied this process to them. It is a nice editing effect on some images. Thanks.
Ответить
Good stuff! Thanks!
Ответить
Super info Mark, thank you!
Ответить
Best tutorials!😃
Ответить
Thats great! Is there a way to also slightly blur the Orton overlay? In PS you normally use Gaussian Blur to the Orton Mask. The Dehaze or Clarity slider only affect the contrast, not that smooth dreamy blurred effect.
Ответить
Thanks for the tip, I will definitely use this, and try it out on some older photos to start with. I use Camera Raw to edit my photos, and some Photoshop if necessary. I loathe the filing system of Lightroom with the catalogs.
Ответить
i guss you could make a preset of this as well right? GRAET VIDEO! 👍
Ответить
Thank you, well done
Ответить
Thanks! That was very interesting with a great demonstration how to apply. Keep,it up!
Ответить
Thank you! That was a better tip than "never moon a werewolf". And I got warm, fuzzy "Office Space" vibes every time you said "just go ahead and...", and it would be perfect if you'd end those go aheads with "that'd be greeeaaat" 🥹
Ответить
Gradiant mask. Just start the mask near a corner, drag diagonally out. Results in an all image mask. Fewer steps.
Ответить
Hi Mark, another great video. It's nice to see different ways to achieve this effect. It shows another way Lightroom is closing the gap with Photoshop and there are fewer and fewer reasons to bring an image into Photoshop. I am curious why you create the mask over the entire image and then intersect it with a luminance range, and don't just use a luminance range to begin with?
Ответить
Always great to get another aspect. Thanks for sharing. Love your channel.
Ответить
Thanks for sharing. Beautiful image!
Ответить
A very useful lesson! I wrote it down in my notebook. Hello from Russia 😊
Ответить
Love it! I made a slight change to the process that might make it easier. Instead of using a Brush mask to select everything, I'm starting with a Luminosity mask that uses the full range. You're still able to intersect this with the Luminosity mask to dial the effect into the brighter portions of the image later. It seems to work identically. Maybe?
Ответить
Love that you can do this now in LR-- Thanks Mark
Ответить
Another great video. It's a good one to make a preset of.
Ответить
Fantastic teaching video. Thanks
Ответить
Really useful video 👍
Ответить
If you want to use the linear gradient to create a full image mask, simply start at the bottom and drag down just a couple of pixels.
Ответить
Thanks Mark sharing this. Wonderful video 😊❤
Ответить
Hi Mark,
Nice tutorial. To mask everything I place a dot with the brush outside op the image and then check invert.
Br,
Richard

What a great video Mark ...a very simple but effective tip 👍
Ответить
I swear half the shit I know in LR is cause of Mark LOL
Ответить
This is something I will definitely have a go at thanks very much for that info
Ответить




![Ryu Got New Combos! [SF6 Balance Patch Update] Ryu Got New Combos! [SF6 Balance Patch Update]](https://invideo.cc/img/upload/RVN1cDdaNEpvdmg.jpg)

