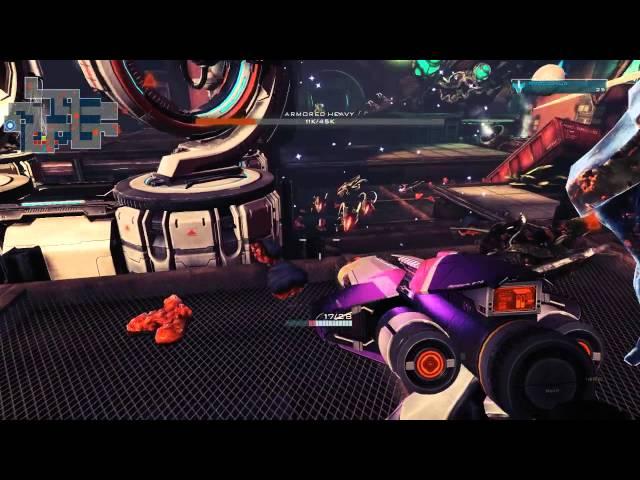
Sanctum 2: All Feats of Strength (5 FoS) - Train Station
This is one of the hardest maps in the entire game to complete solo. The problem is (as many will agree) wave 8, and the sheer MASSIVE quantity of lumes running through the map. This means we need to build towers that deal with many units at once before wave 8 arrives, but a singular player doesn't get enough resources to make many rockets, which are extremely weak until level 3. ACPs are also very ineffective towers right now. So the plan becomes to
1: Find the easiest wave to survive weakening yourself on by building a level 1 rocket before wave 8. That wave happens to be 6.
2. Use both a character and perk set-up that takes advantage of large AOE damage.
--------------------------------------------------
Loadout
--------------------------------------------------
Character: SiMo
Weapons: Sniper / Gatling Laser (OR Tesla)
Towers: Gatling, Rocket, Kairos, Amp
Perks: Static Discharge, Slowing Presence, Corpse Explosion
NOTE: The Gatling Laser is NOT necessary, however I love using it to clear waves of runners. The Tesla works well too, however it could struggle against runners without incredible aim. If that is the case, consider running another explosive gun, maybe even the assault rilfe for the grenades. I would not recommend a sub-weapon that does not have a rapid fire attack or AOE, or you will struggle on wave 8's soakers.
CORPSE EXPLOSION: I am under the impression that this map is next to impossible without corpse explosion, so use it and abuse it. It is the single most important perk to complete this map. The Soakers on wave 8 can be used as ATOMIC BOMBS to clear the extra lumes near them upon death.
CHARACTER CHOICE: I've heard Sweet handles this map just fine as well, but I am a SiMo player personally, and I feel that his ability to boost weakspot damage is the only reason I can take down soakers and armored heavies as fast as I am able.
TOWER CHOICE: The tower selection of gatlings and a rocket can not take out a heavy, so it completely falls to your personal gun damage. SiMo's boosted weakspot damage makes taking out Soakers a breeze, and the Static Discharge perk allows you to ignore targeting other foes while you pound away at the balloon.
MISC INFO: If you question why I didn't place the rocket near the gatlings to be boosted by the amp tower, the issue is that the rocket is needed to hit the many mobs rushing in to soften them up, NOT to land the killing blow. Placing it further forward in the maze allows it to strike a wider area, and kill off many of the broods/runners or chunk walkers BEFORE they reach the gatling wall (basically, thinning the wave out and reducing the work that the gatlings have to do). If you place the rocket in the 8-grid, it may also hit the large nearby wall and waste it's shot entirely. You want it to hit and prep multiple targets, not attempt to snipe a single mob that's escaped through your killbox.
Yes, I shoot the exploding barrels RIGHT at the beginning. I get rid of them ALL on my path. I DESPISE them. I've lost count of how many times one randomly detonated from stray bullets from the NPCs, from my AOE, or from a lume punching one by mistake while trying to hit me. It WILL instantly kill you if close enough, and without the phoenix perk, it WILL end your run. CSS needs to fix this.
HOW TO: Start by maxing the 4 gatlings on the "8-block" bend near the core. This should take place over the first 5 or so waves. Stick a kairos in on wave 5, as shown in the video, to give the gatlings enough time to work, and to clump the units up for you to AOE.
On preparation for wave 6, you will have 4 maxed gatlings and a Kairos. This is the time to place your level 1 rocket, as the boss wave poses little threat and is lax enough that you can get away with having a rocket un-upgraded.
On wave 7's prep, you will have the money to make the rocket level 3. On wave 8, you should take your mine stash and set them in an arc around the core, slightly spread apart, and a few extra on the ground a little further away.
Tower placement could potentially be improved in some way (maybe the rocket), but this is a sure-fire way to complete Train Station.
Helpful Hint: Don't use Scatter Lasers on this map. They are slightly less cost efficient than gatlings, but in return have higher range. Normally, they'd be a wonderful tower, but this range is WORTHLESS on the 8-grid, as level 3 gatlings will hit all the way around regardless. You want mobs to die in a burst, and splitting your damage amongst ALL of the units (Scatters hit random targets) will cause them to regenerate and pass your kill box. This means YOU now need to go play cleanup on the low HP mob that's reaching the core, but you have absolutely no time to do so. If you stop AOEing for a moment, you will be overrun. The gatlings shred out some of the highest DPS possible at one of the cheapest prices, they wont stop shooting until something is dead, and never waste shots with overkill. AKA, that's optimal.
Тэги:
#YouTube_Editor #How_to #Sanctum #Sanctum_2 #Steam #Yogscast #Simon #Lewis #Totalbiscuit #TotalHalibut #Cynical_Brit #Spindles #Train_Station #Tower_Defence #TD #Strategy #FPS #First_Person #Gatling #Lightning #Tower #Summer_Sale #Steam_Summer_Sale #Achievement #FoS #Five_FoS #5_FoS #Feat_of_Strength #All_Feats_of_Strength #Core #Guide #Walkers #Runners #Lume #Coffee_Stain_Studio #CSS #Gaming #Train #StationКомментарии:
The Chaotic Adventures of Billy & Stu - PART 3
GARRYSFACTOR
МИФЫ / БАГИ / ФАКТЫ ФИФА 20
MaxWell
Как правильно выбрать водку
АЛКОБАРД
OMSI 2 - ЗиС 127 Retro Bus [ZIS 127] RUS
mechanicmods
Amex High Yield Savings Account HONEST REVIEW | Best Savings Accounts For 2021
Adam Venture Crypto
ЛОЛИТА. 60 лет / Женский разговор о возрасте, мужчинах, сексе, шоу-бизнесе и одиночестве
Алла Шишкина / Без воды
Keynote: Navigating towards neutral by Isabel Schnabel
CEPR & VideoVox Economics


![OMSI 2 - ЗиС 127 Retro Bus [ZIS 127] RUS OMSI 2 - ЗиС 127 Retro Bus [ZIS 127] RUS](https://invideo.cc/img/upload/RTRHTW5kc0hiY0E.jpg)


