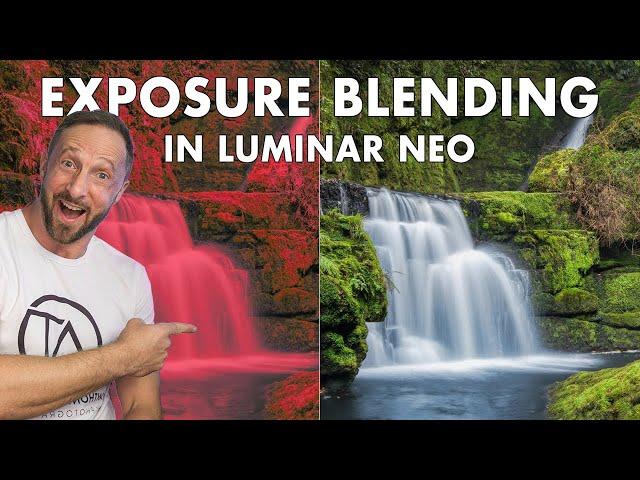
Perfect Exposure Blending With Luminosity Masks - Luminar Neo Editing Tutorial
Комментарии:

Thanks, mate! What I wished for! 🤩👍
I hope though you will do one for real estate/architecture indoors with window pulling! 🎉

Another great tutorial Anthony.
You always explain the video so that everyone can understand, so thank you for that.
Look forward to the next one.

Excellent Anthony
Ответить
Danke!
Ответить
Fantastic tutorial - as always! That is sooo helpful!
Ответить
👍Thank you.
Ответить
Excellent tutorial. As a beginner, can you tell us when we should use this technique and when we should use the HDR merge tool.
Ответить
🤝👍
Ответить
As I watched this video, I was that guy saying OUT LOUD "why not just do a linear gradient from the bottom up?" well sir... you got me. Touché brother. You humbled me. Great video and tutorial. Now you need to pay me rent for living in my head cause it's like you already know what I'm going to say and have answered it. 😅 You're the man Anthony!
Ответить
Thanks!
Ответить
Super as always, Anthony. Could we use this type of layering for "Flambient" photos with real estate interiors? Thanks, Chuck (NE Florida - USA)
Ответить
Spot on Anthony, thank you very much. The way you tutor us is excellent, you make it so easy to follow what you're doing and make us believe we can do it just as well as you. Stay loose mate👍😎
Ответить
Anthony, thank you so much for that detailed explanation! It’s going to require me to view it a few more times to get on top of the technique, but the results you uncovered are amazing! Again thank you for your willingness to share your talents, very sincerely appreciated.
Ответить
Excellent Antthony
Ответить
Appreciate this one. Good idea on the tiff file.
Ответить
Very well done
Ответить
Thanks for that! I have a weird unrelated question - which model of microphone is that? I'm looking at upgrading to a Shure but I was told that you have to be no more than 6" away from it to pick up voice. I see you're not that close and your sound is good so I'm wondering which mic this is?
Ответить
Great explanation compared to the HDR merge. This is exactly what I was looking for.
Ответить
Another great tutorial Anthony, well done.
Ответить
Great explanation thanks, time to try.
Ответить
They did make one of the best updates, but the expected that was the hdr in batch, it makes a mess between the images. It would be nice if it had an option to put the image quality to the HDR merge, 3 or 7 for example . Do you have any solutions for this?
Ответить
Great tutorial! Thank you, Anthony!
Ответить
G'day Anthony
Another amazing tutorial. I have not used the luminosity mask before, but I'll use it now.
Brilliant work, mate.
Greg from over the ditch.

Is the update out? I just checked with the "check for updates" button in Neo and nothing happened. I'm still using 1.18.
Ответить
You’re a brilliant teacher, Anthony. Calm soothing voice, no fussing about and a fountain of knowledge. Keep up the brilliant work 👍 One question, in case you can answer in the future: I’ve tried automatically blending 360º HDR photos in Luminar and they do not work correctly afterwards when viewed in 360º software, where the photo joins there is always a clear line which breaks the immersion. Lightroom on the other hand blends them perfectly and looks seamless. Any tips to resolve that issue in Luminar? Thanks
Ответить
Still on form thanks
Ответить
Hi Anthony. Thank you for providing such great, educational content. Appreciate what you do! Question for you: In my workflow up to this point i've been loading my images and sorting them in Lightroom. Then i'll work on them in photoshop. How do you get multiple images to show up in Luminar Neo? And do your Luminar edits get automatically saved in Lightroom? Thanks so much.
Ответить
👍 Well done! Thanks
Ответить
OMG turn off those damned. Blue. Lights.
Ответить
Hi Anthony, an off topic question which I hope you can help me with please?
I use Luminar AI with Lumix G9 and am able to process RAW images.
I have purchased a Lumix G9 MK2 and am unable to process RAW files.
If I upgrade to Neo will I be able to process RAW images?
Hope you can help
Thanks very much

Who is this?
Ответить
Thx Anthony. What if you wanted to use a full set of (say) 5 bracketed images. Presumably you would have to repeat the process another 3 times. HDR is certainly easier.
Ответить
By far the best and most consistent Luminar teacher on this planet!
Ответить
brilliant, thank you!!
Ответить
Total newbie question Anthony - how are you getting 3/4 different exposure pics of exactly the same scene to work with? Is this done inside the camera at the point of shooting, e.g. it'll give you the same still shot and split that out x3 or x4 with different exposure settings automatically, or are you taking the one image then using LN or another app to over or under-expose the 3 or 4 versions so you can then layer them? Sorry about my ineptitude here....Many thanks!
Ответить
Looks like a terrific tool. I am going to take some nature pictures so I can practice 🙂
But...
I have a question...
Is it OK to change the focus in the different pictures that you want to merge together?

This is an excellent intermediate/advanced tip, Anthony! Thanks for sharing the info that'll help us level up our editing game. And please do more of the "doing it wrong" tips! I learn so much that way.
Ответить
I always learn something new from these videos! Thank You! I love my Luminar Neo!
Now I need to go shoot some bracketed exposure scenes to try this!

Fantastic advice thanks 📸
Ответить
Hi Anthony
I was not no aware you can bracket moving scenes like waterfall successfully.
I have long exposure waterfall shot can I use this technique with only a single shot using layer blend modes?
Or some other way thanks David

Dziękuję bardzo.
Ответить
Your Videos are very good. Can you show us the exposure blending with more , 3 or 4 , pictures please
Ответить
Anthony. My highlights are always blown out. Were these shot on manual? If so my Canon wont let me use exposure compensation.
Ответить
tried this method on a -2 ev and +2 ev waterfall. but I couldn't get it to work. The results were not good but I'll keep trying thanks for the video
Ответить


