How to do EXPOSURE BLENDING in Photoshop
You can follow along this Photoshop Tutorial by downloading the raw files here:
https://drive.google.com/drive/folders/1bYJMgJqwIb-jQjVoyKh-BrAEQIfaIr3F?usp=sharing
▬▬▬▬▬▬▬▬▬▬▬▬▬▬▬▬▬
Thank you for watching my video!
► http://www.the-phlog.com
► Patreon: https://www.patreon.com/phlog
► Instagram: http://www.instagram.com/thephlog
▬▬▬▬▬▬▬▬▬▬▬▬▬▬▬▬▬
0:00 Intro
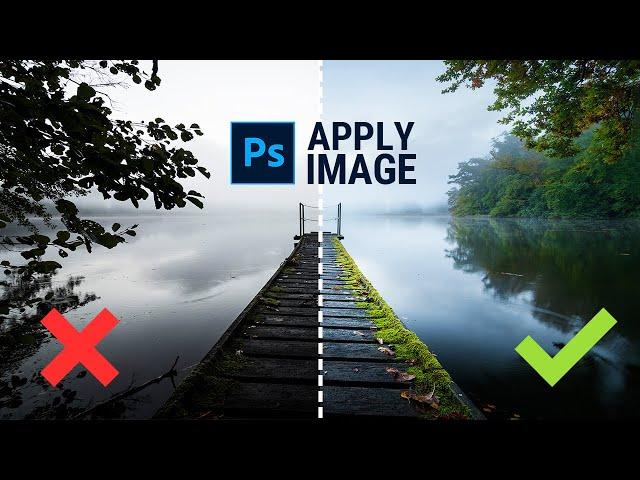
For this shot I wanted to have all the details in the highlights and shadows available. Since the contrast of the scene was quite heavy with dark shadows and super bright highlights, getting all the details from a single photo doesn’t make much sense. To counter that I did some basic exposure blending with Photoshops Apply Mask tool. Before that however, I first worked on the raw adjustments.
0:50 1. Basic Adjustments
For this image I had three different exposures (one for the shadows, one for the highlights and a “base” exposure). I started the raw adjustments o the base exposure and later synchronized the settings with the other two raw files.
I started by changing the profile to Adobe Landscape for a bit more saturation. Then, I adjusted the white balance making the image slightly colder. Since I’m going to blend different images, I don’t bother changing the exposure settings. However, I did add some texture, clarity and vibrance to get a sharp, saturated look.
1:48 2. Masking
I used a simply radial gradient over the boardwalk to add some more texture and clarity
2:13 3. Color Grading
I brought down the yellow saturation, while increasing green and blue. Then, in the calibration panel, I brought down the blue primary hue and raised the saturation.
3:08 4. Exposure Blending
To do the exposure blending, I placed the brightest photo at the bottom, then the base exposure and then the darkest shot for the shadows on top. For this you want to disable the top two layers and add a layer mask on both of them. Starting with the base exposure, I selected the layer mask, then went to the image menu (at the very top) and chose apply image. Without adjusting the settings just hit ok and enable the base-layer again. This way, you can easily blend different exposures, however you might need to further adjust the layer mask to get the desired look in the end!
To finish this, I added a bit of Orthon glow just over the highlights, and then some more contrast using a levels adjustment layer.
#photoshoptutorial #photoshop #photoshopediting
Тэги:
#photography #photoshop_tutorial #lightroom_tutorial #photography_post_processing #lightroom_post_processing #landscape_photography #landscape_post_processing #photoshop_beginner #lightroom_for_beginner #the_phlog_photography #christian_möhrle #how_to_edit_raw_photos #raw_photo_start_to_finish #adobe_lightroom_classic_class #adobe_photoshop_class #photoshop_exposure_blending #how_to_exposure_blend #apply_image_photoshop_tutorialКомментарии:

Great tutorial, thanks :)
Ответить
In what world in 'after pic' better than 'before'?
Ответить
Just realized I've watched like 11 of your videos and hadn't subscribed yet. It was time.
Ответить
When I open the files they don't show as layers :( each image is on its own tab. When I use the script "Load Files into stack" they show as layers. but Camera Raw is skipped. How do you do that ?
Ответить
i love this image a lot!
Ответить
ρɾσɱσʂɱ
Ответить
Thank you for this, very interesting. Hope I'm not being too petty, but the whole time I was put off with the jetty being a little crooked.
Ответить
Super! all your tutorials 👌👌
Ответить
I was waiting for you to use apply image cos it's faster than the way you used to earlier. To complete that way, it's better to keep the original mask "in case of" and to group with a mask as you did at the end of this tutorial. Thx👍👍
Ответить
Thanks for the tutorial. Just a question, why don't you update to the latest TK plugin and keep using a quite dated one?
Ответить
Many thanks Christian !
Ответить
Vielen Dank für dieses tolle Erklärungsvideo Christian TOP!!!!
Ответить
Great tutorial many thanks looking forward to trying these techniques to improve my images
Ответить
After following this tutorial my Pictures got so exposed that i got reported for sexual harassment
Ответить
Is there a way to target the highlights without additional plugins?
Ответить
I am new to your channel, so I am not sure this is on purpose or your style - but your voice audio is missing and it seems like you're explaining something with your cursor.
Ответить

