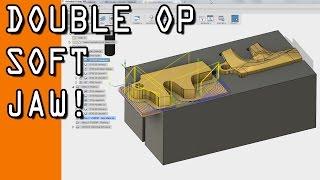
Fusion 360 CAM: Machining the Logo in Soft Jaws! WW116
Комментарии:

have a look at morph spiral for the cutting of the F shape you can go balls to the wall with a ball mill with a small step over, and you can do it with a end mill as well, and it looks good
Ответить
A little tip about avoiding unwanted constraints (or grid snaps for that matter): you can hold Ctrl while moving your cursor around and/or clicking and Fusion will temporarily ignore constraints and snaps.
This works for all the drawing operations in the sketch environment and you can mix and match constrained and unconstrained points within a given polygon by using or not using the Ctrl key for each point.

Did you update the speeds and feeds (such that one won't need to do a feed override)?
Ответить
In the machining video, did you bypass the cross-hatching and only cut in the single 45deg direction? Was it edited out?
Ответить
John, thanks for all the videos mate.
interested in how you do 2 sided machining without using the tool orientation feature?
my post won't allow tool orientation, and if you use another setup, then rest machining is not possible.
Fusion seems to allow you to save the result of a simulation, but can't use this saved model as stock for the next op?
Any tips?

Thanks, John. I made my first set of soft jaws last week and I wish I had thought to drill reliefs for the sharp corners. :)
Ответить
OH MY GOD. repeating dimensions just got 10000000000 times easier
Ответить
If you're tight on time with the number of people you'll have doing this, you can use engrave instead of trace to get a single line letter....as opposed to it tracing around the perimeter......and you could just use your chamfer tool since you'll already have it in there. This is assuming that Tormach hasn't already specifically requested the style and tool to show off the drag engraver. :)
Ответить
Just Plain Excellent!!!
Ответить
Question, Why would you model the soft jaws showing the 1/8" space? Wouldn't that either make the profile too big or too small if you were to either mill it with the jaws either open or closed? I would think that rather than drawing both jaws separate, you could draw them as one body, project the profile then extrude the sketch the desired depth and when you mill it then just have the 1/8" parallel in between your soft jaws. Please excuse the rudimentary question I just would like to know. Great video by the way
Ответить
how did you get the model of the first op?
Ответить
When you run the code to cut the soft jaws, is it expecting 2 pieces of material? meaning, do you cut 1 jaw, unload it, and cut the next jaw. Or do you have to stick both jaws in the vice, separate them 1/8" apart and then run the code against them. Thanks for the awesome videos!
Ответить
For op1 do you model the keychain with the excess material left on?
Ответить
Hope someone can explain why you're not adding in a fitment offset to the sketch/extrude to make sure the part will actually fit into the pocket. Yes, its mostly drafted in Y but what if the part your working with does not have any draft? I would have thought you would need a .002-.003 offset for fitment? After all, they are mating parts?
Ответить
Is the Fusion 360 file still available? Video says link in the description, but don't see that it's still available?
Ответить
How you create the setup?
Ответить