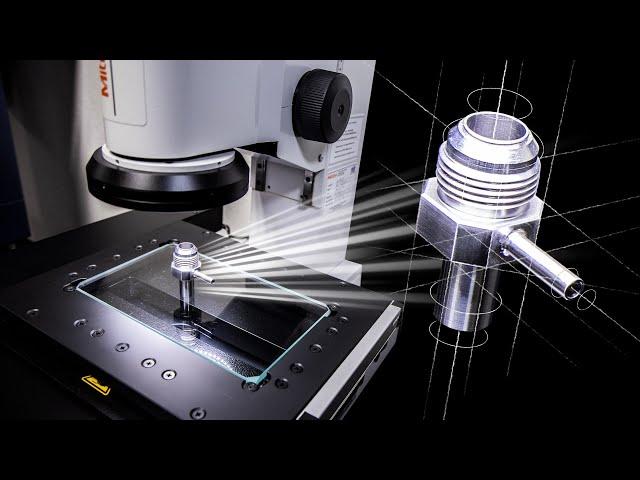
Efficient Technology that can replace a CMM for many shops
Комментарии:

Micro vu is the way to go
Ответить
Something to note this poor design flaw moving the table with an unclamped part can cause small parts to move slightly causing inaccurate measurements. We have one these at work, they are not accurate. You could measure a part, move it on the table and measure again and it would move 1-2 thou
Ответить
Reminds me of a vertex
Ответить
The ergonomics/use look quite nice. But none of that matters if we don't know what the Accuracy Rating is. In inches (or metric I can do the conversion), what is the +/- Accuracy Rating (e.g. +/- .0001"), and Repeatability Rating?
A high % of our work has a total tolerance of .0002". Off the top of my head I'd expect a tool capable of handling that to have a stated spec of something like +/- .000080. Again, off the top of my head. We often have small features that challenge systems like this. As example, a .005" radius between surfaces. or a small .032H x .020Dia "nipple" on a tip that also has a 30-deg taper for 3/4 of it's height.
Bottom Line: Accuracy Rating? Repeatability Rating?
Thanks for the video.

to use this technology, the part has to be really clean in order to eliminate the unwanted errors due to burrs or metallic dust. washing the part after each operation is a normal procedure but deburring every detail other than datums after every single machining operation is a loss of efficiency. Detail deburring is usually done after all the machining operations are completed to the spec.
Ответить
Got one at my work. Hate it. Don't touch the part and re-run it. Will get diff dims. Hard check is king.
Ответить
What maximum accuracy of measurements does it have?
Ответить
Does it have rgb channel?
Ответить
They never tell you the price up front XD
Ответить
I like this! This would help a lot! 😄 Gotta love technology!
Ответить
I have 2 Keyence and Sylvac automatic cameras in my company. Works fine as long as the light in the room is correct, you have relatively flat parts and not go below 0.1 mm shapes (on keyence).
Ответить
Loved this Mitutoyo🔥
Ответить
Keyence has been doing this since 2009... check out the IM7000 if you want to see true Instant Measurement
Ответить
Hopefully those rapid movements aren't moving that unrestrained part.
Ответить
Love these things their great. My first job had one.
Ответить
🇩🇪nice
Ответить
Hopefully it's better than the smart scope that I have used in the past at a past employer that insisted in using it to measure some parts in production that were made by punch presses, it would go down all the time and piss off the qc department who had to come out and repair the damn thing and also stop production because of that too
Ответить
What's the tolerance on this machine?
Ответить
CMM tells the story.
Ответить
great titan boom
Ответить
what a advance technology. awesome
Ответить
can this system automatic generate an inspection report with the file thats used for mesureing the part?
Ответить
we've been using ogp smartscope like 10 years now.
Ответить
Thanks for this video!👍🇩🇪
Ответить
How accurate is this? If you have a tolerance of +/- 0.01 mm in a hole,is it accurate below a hundred of a millimeter??
Ответить
Greeting from Molding Manufacturing Indonesia👏 do you have EDM machine??
Ответить
Does it measure Pitch Diameter?
Ответить
Amazing to see how technology advances. Is this capable of inspecting internal cuts?
Ответить
Be good if the teacher could explain in full with out interruptions
Ответить
BOOM! 🔥🔥🔥 Awesome 👍😘
Ответить
This is something companies like Aberlink have been offering for a long time for a far lower cost with easier to use software. Good looking system though. What's the quoted accuracy and repeatability?
Ответить
I'll take it
Ответить
Great AD :)
But ... for example with this feature - small "pipe" on side - on first measurment it shows 0.250 and on second side it shows 0.249 - i think its to big of a difference.

This is Awsome , how much does one cost?
Ответить


