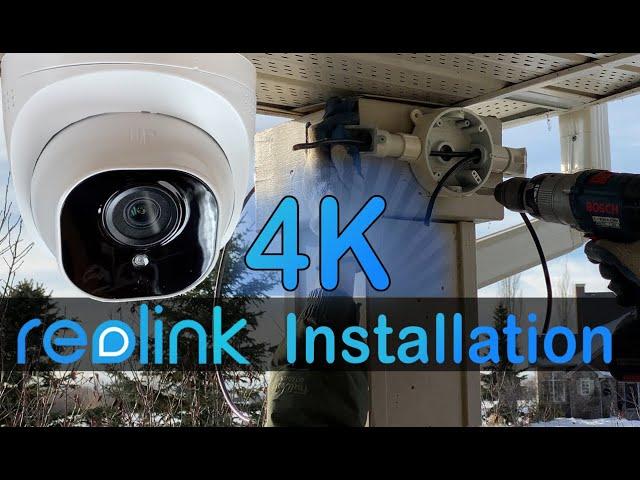
How to install Reolink Security 4K PoE Cameras Outside - in DETAIL
😁😁😁Check Deals at Reolink.com😁😁😁
👍 Reolink Duo 3: https://reolink.com/us/product/reolink-duo-3-poe/?aff=216
👍 Reolink 8 Channel NVR (N7MB01): https://reolink.com/us/product/rln8-410/?aff=216
👍 Reolink NVR and Cam kits: https://store.reolink.com/ca/security-camera-systems/?aff=216
⚡⚡⚡⚡Amazon Product Links:⚡⚡⚡⚡
👍 NVR + 4 4K cameras - RLK8-800D4: https://amzn.to/3viOc4q
👍 Reolink RLC-1220A Camera is discontinued and replaced with RLC-820A: https://amzn.to/3vfJQuC
👍 Patch Panel: https://amzn.to/3TReN2N
👍 CAT6 Direct Burial Cable: https://amzn.to/3gOAmdb
👍 Similar Junction Box: https://amzn.to/3eQ4xSC
My blog post: http://www.hometechdiy.com/install_reolink_d800/
💻💻💻💻 Blue Iris 💻💻💻💻
😀😀😀Download, Demo and Buy Blue Iris: http://www.hometechdiy.com/buy-blue-iris/
Home Depot Links:
Similar Junction box: https://www.homedepot.com/p/Commercial-Electric-1-2-in-Gray-5-Holes-4-in-Round-Non-Metallic-Weatherproof-Box-WRB550PG/300851119
Junction box cover: https://www.homedepot.com/p/Commercial-Electric-Gray-4-in-Round-Non-Metallic-Weatherproof-Blank-Cover-WBC300PG/300852125
I have posted a couple videos on this Reolink NVR and Security Camera kit and today I’ll review with you my install location, run the wires from inside my home to the proposed installation area outside, mount the cameras and lastly check out the footage.
This is a 4K security camera system in a box, including 4X 4k cameras and NVR or Network Video Recorder and it costs around $500US. In those videos, I unboxed the system and introduced all of their technical specifications and then initialized the NVR to ensure it works as expected. Now it’s time to install the cameras in my proposed location. If you are not sure where to install your cameras, do check my video on Planning your system installation.
I plan on installing my cameras here, on this post by my front door. One camera on each side will give me the perfect view. 1. Along the side of my house, 2. My front door, 3. My garage doors, 4. And lastly my driveway. Unfortunately, I don’t have easy access into the 2 sections of soffit and I don’t want to drill holes in these and damage them. Since I move cameras around so much and I’m always upgrading, I don’t want to replace soffit, because for me, it’s not a fun activity. Instead I’m going to use the top of this pillar as my install location but I need to get my network cables up there and protect the wires and connections.
So, here’s the plan. I’ll use direct burial cables and run them in conduit from my basement, out the wall and down into the ground. They will exit the conduit and travel about 8 feet then renter conduit and travel up the pillar and then terminate inside of exterior junction boxes. I will then mount the cameras on the junction box covers. This keeps the cables safe from the elements and gives them a neat, finished look. It also prevents anyone from sneaking up and snipping them. I can even replace the camera in the future with only damaging the junction box covers, which can easily be replaced. Reolink does sell junction boxes for this very purpose, with pre-drilled holes to match the camera mounts. I will be using standard electrical junction boxes from home depot because I need a different configuration of side holes, plus, with standard boxes, you have many more accessories and options.
Let me just say that running wires can be challenging in any camera install project, especially if your home or business is already built and the walls are finished. Every situation is different and I do review a couple in my planning video. It depends on your abilities and comfort level. There are many approaches to completing this task, but today, I’ll be digging trenches, drilling holes in my house and installing conduit.
I’ll install the conduit with the network cables pre-installed. Once this is stood up next to the pillar, I will run the cables inside to a patch panel. Once the junction boxes are installed, the cables can now be terminated with RJ-45 connectors. To install the cameras, I will need to place the junction box cover on first, followed by the mount. The cables roll up nicely into the junction box and can be sealed.
Lastly, I show some sample 4K footage from day and night. Looks better than I hoped.
Thanks for letting me share my install process today. I hope you learning some pointers and maybe got some ideas on how to install a system yourself.
Тэги:
#outside #exterior #conduit #where_to_install #how_to_install #reolink_nvr #reolink #Hikvision #swann #recorder #ip_camera #reolink_kit #dahua #4k #8_channel #16_channel #RLN8-410 #RLN16-410 #RLK8-800D4 #PoE #Security_camera_system #security_camera_kit #best #cheap #review #not_working #problem #amazon #where_to_buy #wall_mount #ceiling #wall #RLC-510a #RLC-520A #RLC-810A #RLC-820A #B800 #D800 #B400 #D400 #RLV-410 #RLC-520 #RLC-511 #RLC-522 #RLC-410w #RLC-511w #Lumus #E1 #junction_box #patch_panel #cctv #2023 #2024Комментарии:
HOW TO FIX WINDOWS 11 STARTUP PROBLEMS
How to Fix Your Computer
Cruzadas de seios de fora na Itália
AFP Português
Halloween At Twisted Elk Brewery
Twisted Elk Brewery Lake City PA
如何畫櫻木花道 | 灌籃高手 | 櫻木花道 | 男兒當入樽 | 畫畫教學
jeffery studio
Dimension of surface tension
Physics mee


