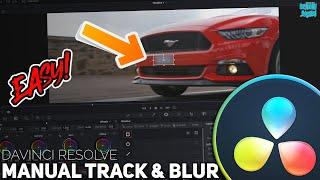
DAVINCI RESOLVE - Manual Track & Blur EASY! (Color Page Method)
Комментарии:

Very good tutorial 👍
Ответить
Thank you very much! Finally I found a good solution. That's really helped me. Many thanks!
Ответить
you are the one bro!!!!God bless you
Ответить
Thank you bro.. Was searching for this the whole time
Ответить
very good, very useful. thanx
Ответить
Thank you! This video was exactly what I was looking for
Ответить
Thank you so much man. I was so sick and tired of those lazy ass auto tracker videos using easiest examples ever.
Ответить
thank you 🙏🏻
Ответить
oh my goood after HOURS of searching for a solution this randomly popped up! thank you so much!
Ответить
Thank you!!!! Lifesaver!
Ответить
Thank you !
Ответить
Very nice! Thank you so much!
Ответить
Thanks!
Ответить
Thanks for making this tutorial!
Ответить
how do you use the manual tracker for camera viewing only? I just want to track something and have it zoomed in so it follows it
Ответить
I followed this to the letter in davinci 18.6 but when I drag the box blur over nothing changes. There is no blur. Any tips are greatly appreciated?
Ответить
Thank you so much! Clicking on the Frame button was the key I was missing!
Ответить
great video thanks a lot mate
Ответить
Lifesaver! Thanks Benon.
Ответить
very useful ,Thank you so much!!!
Ответить
This is just what I needed to be shown. Thanks for making this video, man!
Ответить
Thank you, man! You have saved so much my time to do tracking, when object disappear and reveal again. Very useful and easy to do!
Ответить
Thank you, this was exactly what I needed to learn
Ответить
Thanks for this!
Ответить
thank you so much! took me forever to find this video ! :)
Ответить
What if I want to put an image instead of a box blur?
Ответить
Thank you so much! This really helped me with my class project
Ответить
This is too hard. It shouldn't be this hard
Ответить
Thanks, helpful guide, I can make funny clips
Ответить
best tutorial ever, thank you so much
Ответить
This is so helpful. The automatic tracking was working really poorly for me, and it was so difficult to find a tutorial on this. Thank you very much!
Ответить
Thank you Joel vinesauce, very cool!
Ответить
can I put a image over it?
Ответить
Thank You very much.
Ответить
thank you!!!!!
Ответить
THANK YOU! Saved me the trouble and time of getting auto tracking to look good....
Ответить
Finally a video tutorial which really teach me how to do it. Thx a lot
Ответить
How I can put an image instead of blur
Ответить
I haven't been able to figure out how to actually move the keyframes on the window's timeline. They aren't draggable so if I miss a keyframe by a few frames, I can't just slide it and have to delete and recreate at the correct place. Whereas on the actualy editing tab you can move keyframes. Is there a way to do this?
Ответить
Thank you !!!!!
Ответить
Thank you for this! It may seem like the hard way to do it, but when the tracker isn't working and I am so frustrated with it I just would rather go frame by frame to make sure the blur is correct !
Ответить
super clear instructions, thanks
Ответить
Hi ! And how would you remove a key frame you'd have created by accident ?
Ответить
That sure looks like the hard way to do it to me. Not sure why you would want the box blur either. You can use the frame and manual track without the cuts - then add boxes to the obstacles and use exclusion of them ( little icon that looks like a blind ) as the tracker goes into the exclusion window it disappears- so if you added blur it would continue the animation but the blur would be removed as it traveled over the exclusion windows. Even if you don't do that - each keyframe when it goes behind the pole etc. if while in Frame mode you click back to the square window and drop the opacity - it disappears as well. In most cases, a colorist if possible should leave cutting to the editor and try not to touch the edit. I would also for the sake of seeing the plate while you work - add the blur after the tracking is all done.
Ответить
ty man love ur job
Ответить
