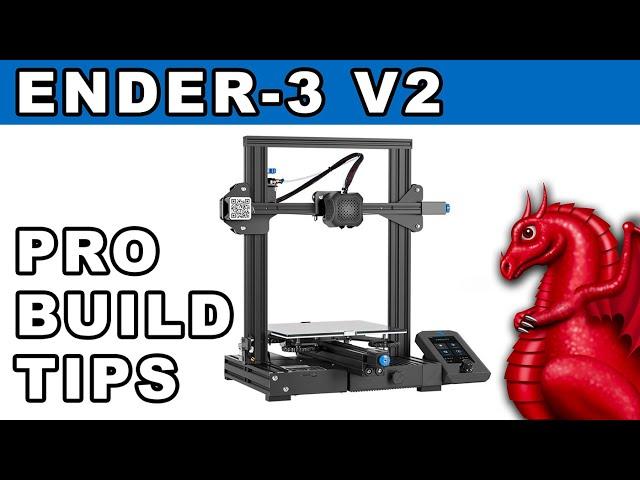
Creality Ender-3 V2 assembly and pro build tips
Комментарии:

Will ANYONE just get to the point?
Ответить
THIS is the video I have been searching for!!! It has been a year since I got my Ender 3 V2 and I am now just getting ready to assemble it. The "manual", although fairly accurate on illustrations, is absolutely no help at all. This video is in my opinion, REQUIRED VIEWING for anyone that has set out to assemble their new Creality 3D printer! And as a bonus, you get GREAT suggestions to help you enjoy it more. I appreciate your contribution and the help it has given me to not only better understand my investment, but how to enjoy it more, and use it more efficiently! THANKS! (liked.subscribed.saved=True)
Ответить
Ok first off thank you for making this I came here because my how to guide got destroyed by a dog and I had to stop several times go back and undue something because I couldn't see what you where doing or what way a thing was facing. The only thing I think would improve your how to is a few more moments of this is how it looks. I mean I still have no idea if my z shaf screw thing should be loose it is can't tighten it or what this big blue thing is for
Ответить
Hello there. Do you have any thoughts / experience with metal wheels rolling on polished metal rod? Some newer 3D printers some with those instead of plastic V slot wheels. Do you think that the same principle still applies (since it is now metal on metal) - not so tight that you cannot spin in without moving the gantry?
Ответить
This is an excellent build guide. Following the instructions carefully, I was all setup within 2 hours. With the added information, there was only a few small issues I was able to figure out very quickly, and the prints are coming out perfectly.
Ответить
Great video. It made assembling my 3rd and 4th Ender 3 v2s much easier than the first two. For me, the only other "must have" upgrades are a BL/CR Touch and the Jyers firmware.
Ответить
I have a problem loading g-code to read
Ответить
After assembly I printed the cat with no seams or blobs. Then I printed a simple 20mm x 10mm cylinder I created in tinkercad.I then used Cura slicer. It printed a line of blobs from bottom to top. Why did the a detail cat print without seam or blobs, but my simple design did not? Any help is welcomed.
Ответить
Excellent video....from knowing nothing, I learned a lot and got my Ender going. Perhaps next time at the total end, just show how to add the filament as this would really complete it off. Once again, thank you for your video.
Ответить
I am very new to this but i got one of these a week ago and have had a miserable time with it! The bed on this thing must be warped because no matter what i do, the bed is so high in the center it hits the nozzle but in the 4 corners it is fine. I've followed the videos to home and level the bed but its always too high in the center. Also the fan in the base sounds like its dry on lube or something, very annoying. Sure it still prints the stupid cat that comes on the sd card just fine but anything larger, more complex and actually useful and the nozzle starts knocking the model all over the place and I'm at my wits end with it. I actually just clicked on the return item in amazon and am going to box this thing back up tomorrow and get it out of here. I know these things get good reviews but Im soured on 3D printing after this thing.
Ответить
I've seen alot of refurbished machines online, I've contacted a few of the sellers and they have said they would replace any broken, missing, or malfunctioning components. As well as things like an available 1 year protection plan. But I've had people say to stay the heck away from refurbished regardless. What would you recommend? An Ender 3 V2 for the price of a Ender 3 is tempting.
Ответить
this looks extremely difficult to do properly
Ответить
Wonderful video. Thank you
Ответить
I got this yesterday and after assembling did first print came out good but my dought is I got 2 extra rail don't know why. One is top filament holding rail another is extruder running rail anyone knows please let me know.
Ответить
I generally don't comment on videos however I've been 3D printing for a couple of years mostly on an Ender 3 Pro. Lately the thing has just become a monster to keep working right and I finally went and grabbed an Ender 3 V2 yesterday. Your video helped me build to perfection and the first print is still humming away and looking perfect after 12 hours. Thank you for an excellent video that explained the build in ways that just made sense.
Ответить
holy shit get to the freaking build already. This was worthless for a beginner building his first printer,.
Ответить![[NL] Loco vs World [NL] Loco vs World](https://invideo.cc/img/src/anItb24tZmZmZmZmMDB4MGMtay1jLTA5cz1BNkx6TzEzVUhDS1Fxam1IamxqdkMzaUpEU0xQbjgtZUJuSXg2NzBSYWxvUE9BL2N0eS9tb2MudGhwZ2cuM3R5Ly86c3B0dGg.jpg)
If I were to follow your great tutorial it would be great if you had timestamps per part to skip things I know how to do. It would be an extra eye for detail on top of this super awesome tutorial! I am saying this because I am following this tutorial because I just bought one.
Ответить
Hi Tom! You pushed me over the edge. I had been eyeing an Ender 3... and I couldn't resist any more. Thanks for the great tips!
By the way, I've been enjoying Fat Dragon products since the 3D paper days. Glad you're still doing well in the industry!

I followed this to a T and it worked. Ordered the parts you suggested. I assembled it and then later tore it all apart again because the vertical posts were not straight. It took a little time to get those right on the money. That part is critical and you did a great job illustrating how they work. At first a guy would assume you just tighten bolts and it’s gotta work. Not with this.
Ответить
Phenomenal video and thank you so much! The instruction book I received was terrible and would never get this assembled using it alone.
Ответить
Just built mine using your guide having watched it a dozen times. Thank you so much. Just printing my first test cube and it looks amazing so far.
Ответить
lol ez
Ответить
I just got my E3v2 and setting it up was super easy thanks to you and your video! The ready bed leveling was great too. Can you make a calibration video for us noobs please?
Ответить
What do you use for adhesive on the bed?
Ответить
First build... After an expletive filled 3 hours I finally got it. Thank you!
Ответить
O K, ...last step. I had to switch to your video, after watching another video. Yours was great. Messed up a eccentric nut that factory tightened too much. and another hangup, the square I was using was not square. Had it for years, and just noticed it had a problem. So, check your tools too. About 2 days. First one. And now leveling.
Ответить
Amazing video! Couldn't have built it without it!.
Ответить
Great video but I got 15 mins in when I decided this was just too much hassle and thankfully my Ender3 v2 has not been opened yet (only got it yesterday) but I'm going to chicken out and refund it, this is too complex.
Ответить
Great video, assembled my ender v2 right along with the video. Muy Bien senor!
Ответить
trash "order" of assembly
Ответить
Can you check your PC4-M6 Fittings and PC4-M10 Fitting Connector links to amazon. A package brand name shows. Is the strong connector suppose to be from Creality or a 3rd party to improve them?
Ответить
You have a very mechanically inclined mind and a great way of expressing and explaining what point you are trying to get across, and it's a beautiful thing, and much appreciated. I will add that your videos are the perfect pace, great sound, video and animations to explain your point from a different angle. Very informative and easy to watch, and I want to thank your for giving me your information and experiences, it'll save me a heap of time. Thanks again, liked and sub'd
Ответить
my biggest challenge now is finding two things the same size like your bottles there - I swear there's nothing in my house like this, lol. ive looked all over!
Ответить
I don’t fault you for using a plastic measuring tape I will however criticize you for saying MAYsurment lol only kidding love the video a year later and this is still the best video on this
Ответить
Thanks for the video tutorial.
Ответить
Thank you so much for this. Could somone please explain how tight the belts need to be? Thank you again!
Ответить
Holy red foley! Tom what an amazing video! Got my E3v2 built tonight. Noooo way I could have done it with the manual. Your tips and hints really helped square things up. Never would have known level and plumb were so important. I got them purt near perfect.
My first run with the bed leveler gcode looked pretty danged good. Tribute to your expert instruction. Left side of bed knobs needed about 3/8th turn each and voila.
Thaaaaank you. Will be referencing this video when I do my Amazon review as critical to setting this printer up.
Thanks again! -John

The springs are currently out of stock
any alternative to them?
I'm not sure what to look for exactly

what is the difference between the 2 links to bowden tube connectors? just the amount of pcs?
Ответить
Thank you for this informative and helpful build and mod video. Excellent job! Would be interested in more mods you would recommend.
Ответить
I found this video a lot more in depth than Just Vlads and personally wish I would've found this first. There is just one thing he covers that you didn't that I think is somewhat important: checking already installed screws at the base and making sure they're tight. He also goes over loosening the base legs and making sure all four corners are flat on whatever surface you use, then re-tightening once you've made sure they're all flat. Again, they're both excellent videos but I'm just throwing out that extra info out there for people because mine did in fact have some loose screws on the base.
Ответить
Love the intro!
Ответить
Just excellent!
Ответить
![[FREE] Drum Kit "Dreamscape" | (RnB, Southside, Wheezy) Unique Drum Sounds 2022 [FREE] Drum Kit "Dreamscape" | (RnB, Southside, Wheezy) Unique Drum Sounds 2022](https://invideo.cc/img/upload/VXpGSHZPMDg0RWE.jpg)


